Showing posts with label embossing powder. Show all posts

Wednesday, July 4, 2018

Contented spirit

Hello everyone,

and welcome to my blogpost today ! I have made a mini canvas and have filmed the process so you can see how I made it and what I did with the chipboard.


If you want to see the tutorial click HERE

or go via this link:


I have used : 


Thank you for stopping by today ! 


Monday, March 19, 2018

No place like home

Hello everyone,

For my post today I made a mini Art Journal page.


 I kept it really simple this time. I stamped the background and then heat embossed it with two layers of Seth Apther's Baked Texture "Vintage Beeswax". Next I embossed the edges of the page with "Ancient Amber". I didn't do much to the Tiny Houses chipboards, just wiped them over a brown Archival ink pad. The line of music paper and the sentiment were also heat embossed with the Vintage Beeswax powder. 


A close up. 


Doesn't it look yummy ! 


I have used the Tiny Houses Mash Chipboards and you'll find them HERE


Thank you so much for stopping by today ! 


Monday, March 5, 2018

A wallhanging ...

Hello everyone,

I am sharing a wallhanging today. It was also an experiment with embossing powders which didn't quite go to plan, oh well..


And here's what I did to the chipboard.. 


I glued the star chipboard on some book paper..


I tore off the excess... 


I then thought to fill it with UTEE but see what happened:


I decided to go with it anyway and added a layer of the new Emerald Creek/Seth Apter embossing powders of the top. I used Dirty Sand. 


Sorry for the blurred photo, my camera obviously focussed on the pot of embossing powder.. 


I actually think that looks really cool ! 


So here is the finished project. The base is grey board of which I painted the edges with black gesso. The top layer is a piece of a box. I tore off the top layer of paper here and there to expose the ridges. 
I added the model paste through the UmWow Dahlia stencil, then added a layer gesso over the top.
I used Lindy's Sprays to colour the paper. 


I think it turned out nice, even if I did have trouble with the UTEE.. 

I have used the Dahlia Stencil --> HERE


and the Sketchy Star --> HERE


Thank you for stopping by today ! 


Wednesday, January 17, 2018

A little note book.

Hello everyone,

and welcome to my blogpost where I am sharing a little book with you. I have recently rediscovered my love of making little books and I couldn't resist to make one for today's post.


This little book was made out of 1 sheet of 12' x 12' paper and I glued some fabric on the outside to give it even more interest and also keep it together. 

Here's what I did to the chipboard:


I started with 2 layers of gesso. 


Next I heat embossed the pod-bit of the chipboard. 


Next I am used a Pitt Big Brush Marker by Faber Castell to colour the top and the stem. 


I added some white details too. 

And here is the finished booklet:


I used an Um Wow Studio stencil and some modelling paste for the front of the book. When the paste was still wet I added som embossing powder and then heated it... 


I have used this Chipboard:


It is called Poppy Pod Skellie and you will find it HERE

I also used this stencil :


This is called Wheat Stencil and you will find it HERE

Thank you for stopping by today ! 


Thursday, December 28, 2017

Be brave - Fly

Hello everyone,

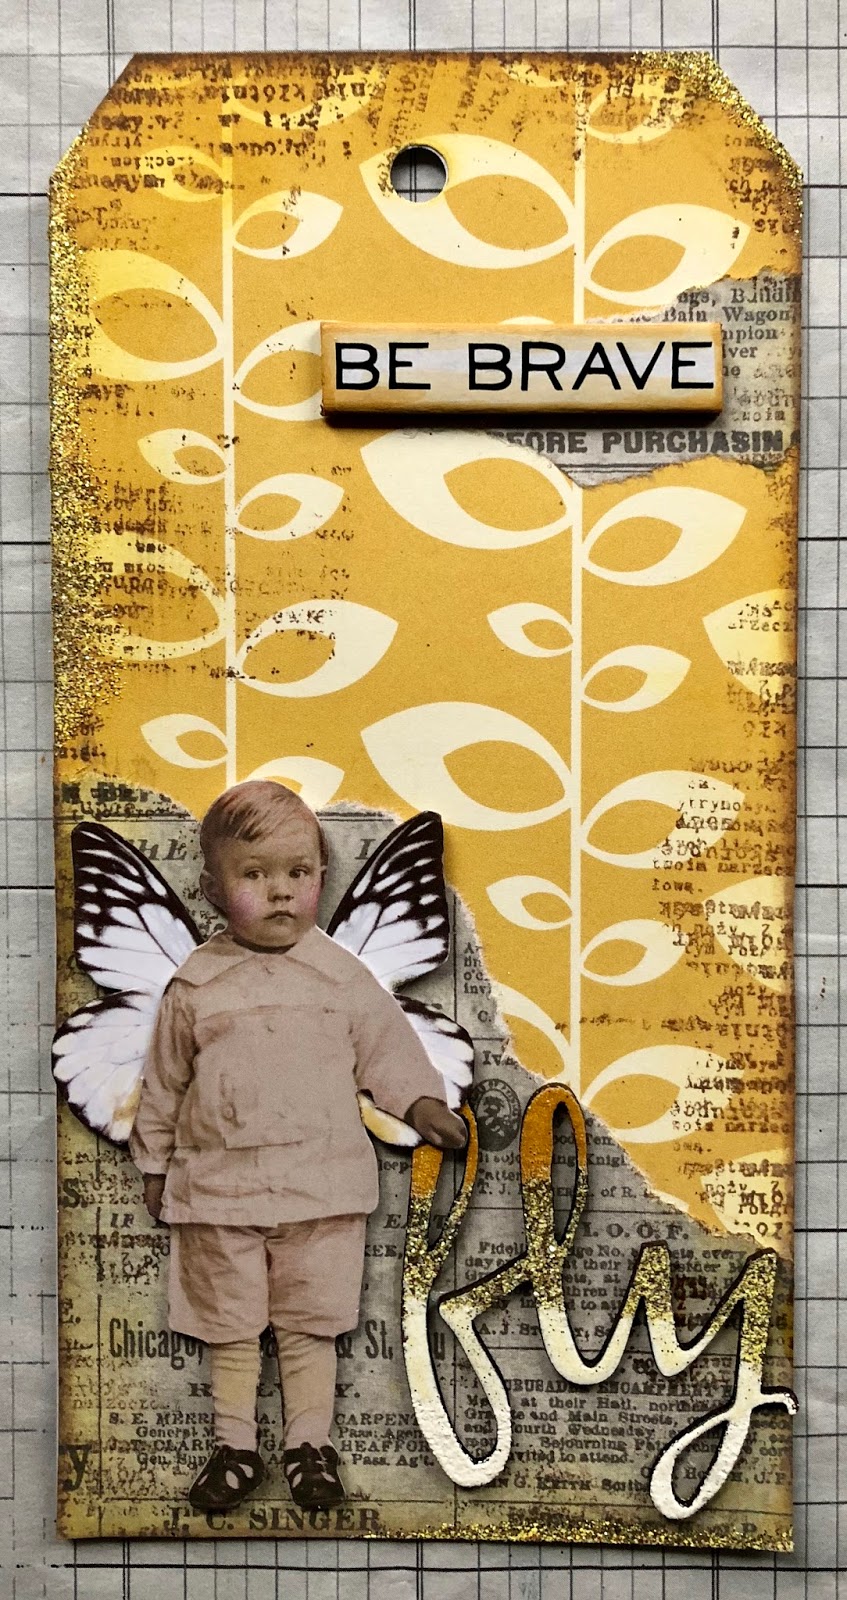
and welcome to my blogpost today. The year is almost over and I am happy to share one more post for 2017. I have made a tag:


This is what I did to the chipboard:


I love these chipboards because they are really sturdy and you can abuse them all you want ! 


I decided to go easy today and heat emboss it with 4 colours of embossing powders.


Here's what that looks like.


A little sparkle too ! 


The base of this tag is some pattern paper on which I glued some text paper and then inked the edges all around. I also did a little bit of rubber stamping, only around the edges. 


The child is a paper doll by Tim Holtz and I gave him a tiny little bit of colour. I also gave him butterfly wings. These are also from a set by Tim Holtz. Lastly I added some of the glittery Yellow embossing powder along some of the edges and then called the tag done ! 


I hope you got some inspiration from my post ! 


You'll find the 'Fly' chipboard HERE

Thank you for stopping by today and Happy new Year ! 


Wednesday, November 15, 2017

Believe in yourself

Hello everyone,

Today I have made an artjournal for you. I must say I really love the Um Wow Chipboards because they are so sturdy. They stand up to a lot of abuse....


I have also used some (very old) design paper, a paper doll, some lace, paint and fabric for this page. The chipboard was embellished like this :


First I tool the scissors to it as I didn't like the straight edges so I did some trimming. Once I was happy I pressed my VersaMark ink pad onto the chipboard and sprinkled all three colours embossing powder onto it and melted them. 


This is how it came out, quite nice but I decided to sand some of the shine off and get some of the chipboard out again. 


This is the finished result and I really love it.  


A couple of close - ups ...


You can see where the chipboard is peeking through again. 


And this is the finished page ! 


I hope I have inspired you to dust off the chipboards and use them too ! Maybe even to make a card or something ! They are so versatile. 

You will find the Damaged Punchinella background I used HERE


Thank you for stopping by today !