Showing posts with label daisy. Show all posts

Saturday, May 16, 2015

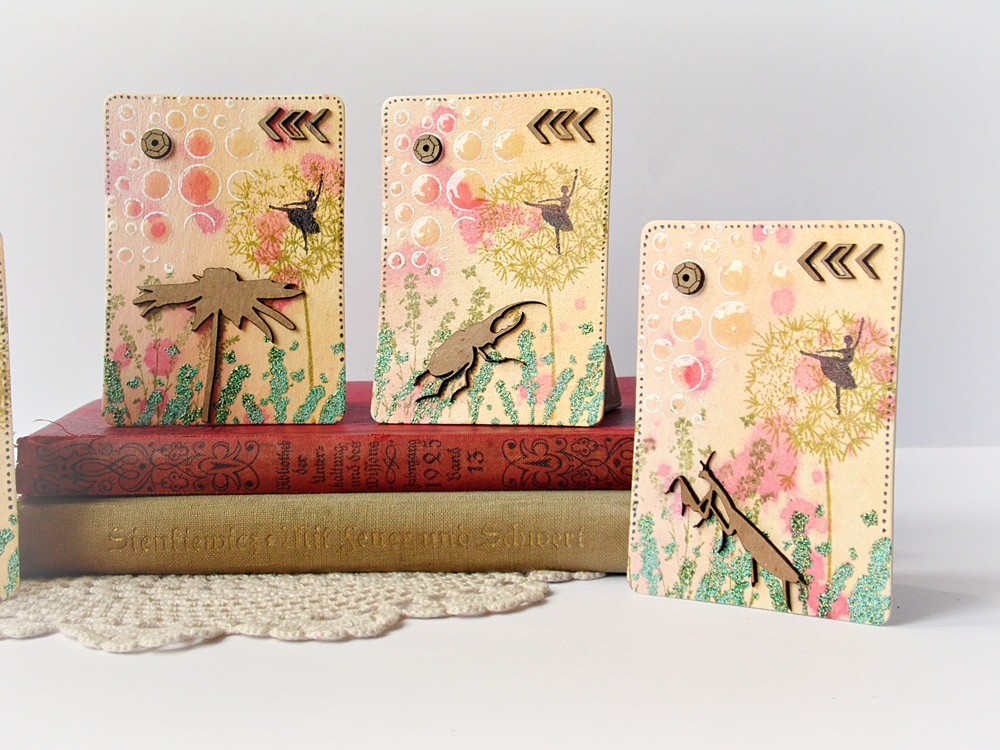
Thumbelina ATCs


Hello there :) 
I've created 4 ATCs telling the same story
 - a story about Thumbelina.
Beautiful UmWowStudio's chipboards helped me a lot!

You can find there some beautiful creatures 
living deep in the grass and some amazing plants:


Here you can see some closeups:


Have a lovely day :) 


Thursday, May 7, 2015

Summer Card by Tanya Dudkina

Hi! How is your Thursday? Hope you have fun today!
 It feels like summer is coming soon and I was so much inspired to do a bright and sunny card!
Let's have a look?


Lot's of pink, lot's of yellow and of course splashes!
I took this gorgeous flair from The Bee's knees set
and added nice Daisy chipboard


Some details


UmWowStudio products:

The Bee's Knees Set


The Bee's Knees Set

Daisy


Daisy

Hope you enjoy my card and have a nice day!!

Tuesday, April 14, 2015

Esprit Campagne by Ladybird

 
Today, I am here to share a Spring/Summer layout.
I tend to be quite reluctant to use flowers for my boys layout, but each time I do it, I wonder why I don't do it more often! Flowers and delicate colours have also their place on little boy layouts.


 I am in love with this flair, it's so... beautiful!
 And the arrow confetti are perfect to add some dynamism to the layout!
 For this page, I used:
And: Crate Paper + October Afternoon papers, Pink Paislee, Basic Grey and MME products.

Saturday, September 20, 2014

Guest Designer Riikka Kovasin

Today we have the fabulous Riikka Kovasin joining us again! We love her mixed media delicious style.


My name is Riikka Kovasin. I'm a mixed media style crafter from Finland. Scrapbooking layouts are my
biggest passion, but I also love to create canvases, cards and recently I've grown an interest on ATCs. Please visit me on my blog or other social media sites!

[You can find me: blog | Facebook | Instagram | Twitter | YouTube | Pinterest]


Hi there! Riikka here to share a few projects with you! I'm so happy to be invited to guest here at UmWowStudio and play with the fantastic goodies! Thank you DeeDee for this opportunity!


For my first project I created a scrapbooking layout. One evening while we were in the park and kids were playing, I was trying to be cute and said to my husband that I'm silly about him. He then turned the
sentence into a wordplay and the title phrase "I'm herring about you" was born. Maybe you would like to
hear the explanation? The word "silly" is pronounced the same way than the Finnish word for herring, silli.


Strange humor perhaps, but we share the same kind of sense in that. I started the page by applying gesso to the background and then added some mists on top.


I then used the UmWowStudio stencil to create a subtle pattern with PanPastels. I used the same stencil to create the 3 D effect here and there and finished the bubbling feeling with different circle chippies. You can see the process from the video I made!


Supplies from Um Wow Studio:
Circle Confetti mask, Button MASH, Circle Confetti, Layered Arrows, Make A Wish flair set


I also made a few tags for this post. I love how real looking the plant chippies from UmWowStudio are.
I colored the chippies first with different embossing powders sprinkling them there where they were
needed. Then I added other media like PITT pens, alcohol markers, pencil and Archival Inks on top to get
the grungy feeling. There's also more than one coat of embossing powders in the pieces in order to achieve the natural look.


All the tags are assembled the same way, only the colors change in each one. For the daisy I used yellow
and made the ribbon into a bow to give it a slightly feminine look and also to balance the composition. The bluebelle on the other hand has quite naturally blue color scheme and the thistle purple. For those I used smaller amount of ribbon and a black thread to get stronger look. The papers used in the tags are from the 7 Dots Studio's "Nature Walk" collection, designed by DeeDee!

Supplies from UmWowStudio:


Circle Confetti mask
Button MASH
 
Thank you for joining me here today! I wish I have inspired you! If you have any questions, please just leave a comment or mail me! Wishing you all a lovely day!

Tuesday, July 22, 2014

Summer Blog Hop Day 2

Hello Friends!! Welcome to the SUMMER BLOG HOP between UmWowStudio and Susan K. Weckesser Inc. We'll be sharing gorgeous bright and shining inspiration with you from both teams all week long. Be sure to keep visiting, hopping and commenting to enter to win one of TWO prize packages. Each day is chock full of goodness and we don't want you to miss a thing.

Day 2 brings us treats from Tusia and Miae, see their projects below and click their names to visit their blogs where they've got more details :)

First is Tusia with this magnificent piece:


UmWowStudio : BlueBellDaisyFloral CollectionMiniature Blank PolaroidLayered BannersCelebrate Hashtag Banners 

Susan K. Weckesser Inc:
Live in Color - paper
Color Burst - paper
Poised and Pretty - stamp set


And 2nd is Miae with another just as magnificent layout:


UmWowStudio : This Day Hashtag BannersChevron ConfettiChecker Board MaskWood Textures Flair

SKW Live in Color CollectionABC. 123. Washi stamp set


Now be sure to visit the Susan K. Weckesser blog to see what's happening on their side! Leave comments for your chance to win a prize pack full of UWS and SKW.

Wednesday, May 28, 2014

Playing with chipboards :)

Hi :)
Anai here with yet another project with our amazing products :)
This time I decided to experiment a little bit with the chipboards. Usually you can see me using chipboards with just a little bit of paint or glitter on top of them. This time I wanted to give them much more adventurous try :)
I've been using some other chipboards with mist before and I've learned a hard way, that most of them is not able to handle that much of the moisture... When it comes to all kinds of mists they were usually soaking too much, breaking and falling apart...


Well - I'm proud to say that UmWowStudio chipboards are probably un-breakable :)
I used some Lindy's Stamp Gang mist here and I haven't use any kind of primer on the chipboards. I've been misting and heat drying, misting and heat drying... and I think there's about 20 layers of misting and drying here :) 


I was trying to achive this very cool glimmery almost "metal" look.
Our chipboards are actually dark brown so you will not see a lot of color here (the effect would be different, if I would cover the surface with a white paint or gesso before misting), but the shine is amazing :D


UmWowStudio chipboards are thick and stiff. They look almost like they would have been cut in wood :) When you work with a lot of watery media - your base usually start to bend and curl. This tag bended a little bit, but I was able to keep it flat. I have to say - this is a product just perfect for mixed-media projects :)


This cute single daisy flower was covered with paint, thick layer of glossy accents and black glitter and it also haven't change its shape even a little :) 


It was really fun to work with this little mixed-media project. I'm going to use this tag as a fridge magnet. Because of all this shine - it looks different from every angle, so it will be very cool to look at it every day :)
Anai

UmWowStudio Products:
Circle Peek-a-boo Tag Book
Hexagon Confetti
Daisy
Life is Good Flair

Monday, March 3, 2014

Make a Wish...

Hello and Happy Monday!

Tina Walker here today with my first official UmWow Studio Design Team project!  Woo Hoo!

My head was spinning with so many great ideas on what to create for my first project, so I thought I'd share a quick Mixed Media canvas, full of whimsy, fun, and childhood wishes!


The base of my canvas was created with Spray Mists and had been sitting in my 'experiment' drawer.  Yes, I have a drawer just for things created as experiments.  :)  Often, when I am not sure where to start, I pull out this drawer and look for inspiration.  And this time, it worked.

I knew I wanted to use these chips from UWS, Daisy, and Sunflower!  From initial appearance, these lonely, solitary flowers looked like they needed some love and delight.  So I built a whimsical and fun canvas around them.


I 'dressed' them up with a super quick, easy, but totally cool way.  Using spray Gesso (I wanted a thin, smooth coat of Gesso for stamping), I covered each flower.  Once the Gesso was dry, I stamped them with word images for a subtle, yet effective look.


I added several more whimsical details, such as this UWS flair, from the Wild Flowers Set, which I've been hording FOREVER!  To add some interest to the flair, I used a Stabilo All pencil on the edges and added water.  Just a small detail, but really added to the whimsical look.


I also used several small pieces from the Circle Confetti, covered with glitter.  Just a bit of glitz and shine!


That is what makes UWS chipboard and embellishments so perfect for any project! They can be dressed up or down depending on what you are creating!

I hope you enjoyed my first project!  Thank you for stopping by!  Have a great day!

Tina

Thursday, September 26, 2013

♥ Bangs {May Arts & Faber Castell}

Hello Folks!!


Welcome to my part during the insanely inspiring May Arts and Faber Castell swap week! I hope you've been visiting blogs all week! There's a beautimous prize up for grabs... and the Faber Castell goods work like HEAVEN with the vast abundance of May Arts Ribbons available, so I wouldn't want you to miss anything along the way♥


I've been working on a little general self improvement, and recently worked up the balls to cut some side sweeping bangs into my former one length locks. 
I. LOVE. THEM. 
So I marked the occasion with a 12x12! And what better style to create my layout in than a bit of cream and pink femininity! 


The May Arts ribbons used include the Eyelet Lace(447-58-01 White), the Sheer Box Pleat(392-58-01 - WHITE) and the Pink Burlap String(SM-17 Pink.) I also used a Metallic Melon Gelato from FC to both stamp in and splatter across the page and my embellishments. The FC Metallic PITT Pen in Gold makes the perfect little doodles along the edges of the page and photograph as well as handwritten title. Along with the doodles around the edges I added in a few complimentary circles mixed in with the Gelato splashes.


Other products used include  UmWowStudio (Mini Polaroid Chip, Circle Confetti Mask, Daisy Chip, Swallow Chip, Layered Hearts Chip), My Mind's Eye (Buttons and Brads), Viva Las VegaStamps! (Snail, Line of Chevrons, Striped Border Arrow, Open Immediately, Feed Your Soul), Gauche Alchemy (Washi Tape), Glitz (Giant Rhinestone), Prima (Daisy Layers Paper Flower), BasicGrey (Serenade paper), adhesive, gesso, thread, seed beads, eBeads, basic archival ink in black and a paperclip! 

Please please PLEASE Make sure to see all the beauty today by visiting fellow Ribbonistas GINI & EMILY as well as the May Arts Blog and the Faber Castell Design Memory Craft Blog!