Friday, May 26, 2017

Meet our CREATIVE TEAM!!! ---

Hiya Folks! I'd like to introduce our creative team to you today! These fabulously talented ladies will be joining us through the end of the year to inspire with all our fabulous products.

We were really blown away by our last round of applications and we wanted to say THANK YOU to each and every person who applied and we encourage you to KEEP applying! There is only so much room on our team and we unfortunately do have to turn away a lot of people we'd love to be part of our family.

Now onto our new team!


This is seriously a super talented group of individuals and it is INSANE. we cannot wait to be inspired!

Please let them know how excited we are and then visit their blogs to see their beautiful artworks. They'll all be posting on our blog starting now! 


Thursday, May 25, 2017

A house and a bicycle ! PLUS a YouTube tutorial...

Hi everyone,

I have a new project for you today as well as a YouTube tutorial.


I really enjoyed making this little house and decorating the bicycle. 


From another angle... 


Close up of the bicycle...


So cute, isn't it ! 

I have used :


Basket bike and you will find it HERE

and


Chunky heart stencil and you wlll find it HERE

The video tutorial :


ENJOY ! 

Thank you so much for stopping by today ! 


Wednesday, May 24, 2017

What does one do???


Hi UmWowStudio Fans....
I must tell on myself....
when I started this project I had
ZERO inspiration
ZERO creativity....
just a deadline to make!
What does one do??
Go back to what you know works.....
a piece of paper,
a stencil and a bit of medium
and so I began.....

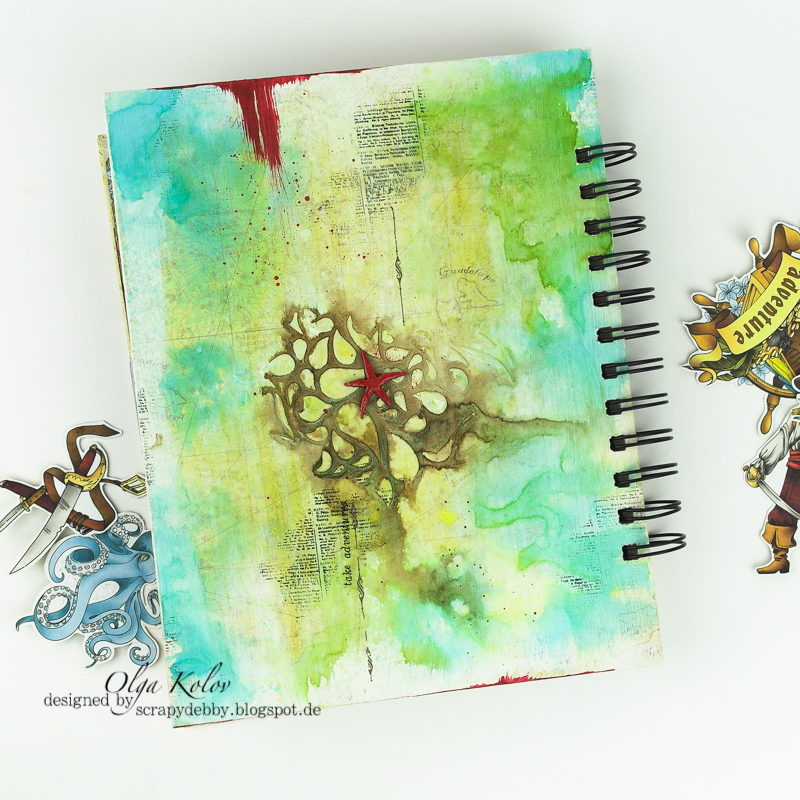
I applied modeling paste through my


onto a sheet of 7DotsStudio ~ Fortune Teller paper.
(a round of applause to our fearless leader for this AWESOME paper!)
When it was dry I applied a layer of Clear Gesso
to help the next layer of color move easily.


I thought I was creating a video on how I did the next step
but seems to be......I was mistaken!

Then, I pulled out my package of
Ken Oliver's Liquid Metals.
I randomly dropped color onto my stenciled paper,
then spritzed with water and let it run.
When I was happy with the colors,
I dried the paper and tore the paper into strips.


Next, I pulled out a few of my newly acquired textures
a bit of fabric from a flea market in Florida
a few pieces of paper mesh
and my good ole standbys
dictionary paper and flute.

I tore them into various pieces and arranged them on
a 12 x 12 piece of kraft paper.


I then adhered all my pieces down with multi medium matte.
When dry, I used a fan brush to randomly apply
more multi medium matte on my "paper"
which I sprinkled Glass Glitter into.


When everything was dry, I flipped over my new "paper"
and cut into various sizes.

.....I applied my new "paper" to a greeting card base and
here are the results!!


I used a NAKED UmWowStudio ~ Gears Strip
behind my flower cluster.


I even made a bonus card.....
I painted a diecut ivy and...


Here are the results...


Not bad for having
ZERO inspiration
ZERO creativity....
Sometimes you JUST HAVE TOO.....
and it will come!


Other Products used:
Tattered Angels
Glimmer Mist
Chocolate Covered Strawberries
Precious Metals
Glimmer GlamLime Cordial

Yvonne Blair Designs/IOStampsCard Sentiments

The Crafter's Workshop
Black Modeling Paste
Clear Gesso

Sunday, May 21, 2017

Travel Book with Olga


Hello friends of UWS! I'm here today with you and I want to share my travel book. He comes with me to the family vacation!


I have covered my chipboard with the red color and glossy accents for more volume and gloss ;)


I have made divider and different blocks - note paper, watercolor paper and craft paper.


The back side I have pointed with one starfish with color and glossy.


On my dividers I have used chipboard too


I have added envelopes for extras ..


And don´t missing the pen!


Supplies I used:


Stay creative!

Olga xxx

Wednesday, May 17, 2017

Spring has SPRUNG!


The trees are sporting their baby leaves.
The animals are titterpated and

the birds are busy building their nests.
And FINALLY the sun has come out!

So, I thought embellishing a
Birdhouse would be apropos!
I began by covering my entire birdhouse
with white gesso.


I then cut paper to fit the sides of the birdhouse.


I then pulled out my
UmWowStudio Damask Stencil
and applied a bit of texture medium 
through it.


When dry, I adhered the papers
to my birdhouse.
I spritzed my birdhouse and a bit of 
vintage ric rack with a mist.


I applied a layer of texture medium to
a chippie for the
UmWowStudio Floral Collection
and then colored it with a bit o glam and mist.


I accented the
UmWowStudio Button Mash
with a bit of glam.


 I had covered the roof with pieces of
decorative wood but I felt it needed something more.

So, I pulled out my
UmWowStudio ~ Grid stencil
and applied a bit of texture medium through it.


When dry I spritzed it all with a bit of mist.


Now, you know my birdhouse needed to
say something.
So, I chose a stamp, stamped it,
cut it out.


Here are a few closeups of my finished Birdhouse.


Do you see the little piece of the
UmWowStudio ~ Grid Border??


I hope you enjoyed my piece of Spring....


Other Products Used:
Tattered Angels
Glimmer Mist
Crushed Shells
Taffy

Glimmer Glam
Just Peachy

7gypsiesArchitextures 8 x 8 paper pad

Yvonne Blair Designs/Impression Obsession
Everyday Quotes

The Crafter's WorkshopLight and Fluffy
White Gesso

Perfect Paints
Polishing Plaster
Apricot Lily
Sunwashed Clay