Showing posts with label PanPastel. Show all posts

Thursday, January 29, 2015

Petit modèle by Ladybird

Today is my first blog post as creative team member for UmWowStudio!
I've decided to show you a sunny layout to warm up your day,
if you live like me in a cold part of the world! :)
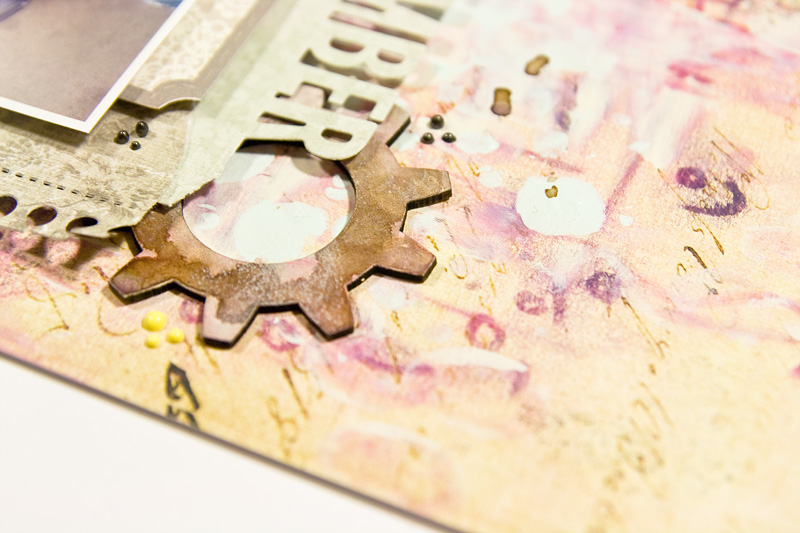
 I added a coloured paper under the pocket chip to add dimension.
 
 
And don't hesitate to cut the chipboards to adapt them for your needs. This is really easy to do.
See here as I cut a leaf stem.
And the result on my page...
The products I used:
Today Chevrons Pocket Chip
http://umwowstudio.com/chipboard/pocket-chip/100173.html
Leaf Stems
http://umwowstudio.com/chipboard/flora-fauna/100239.html
 Circle Confetti
http://umwowstudio.com/chipboard/confetti/100053.html
Celebrate Hashtag Banners
http://umwowstudio.com/100202.html
Line of Chevrons Mask
http://umwowstudio.com/masks/100091.html
Wild Flowers Set of Flairs
http://umwowstudio.com/flair/100049.html
Other supplies:
Papers: Crate Paper, Bella Boulevard
Letters: American Craft
Ink: Dylusions

Have a great day!

Tuesday, June 17, 2014

Believe you can....

Hello and Happy Tuesday!

Tina Walker here today with an Art Journal page, using some of my favorite UWS products and PanPastels.  UWS products are so versatile and can be used on a multitude of projects.  Combined with PanPastels, the possibilities are endless.


To begin 'building' my page, I drew several 'rays' extending from the bottom of my page. 


On alternating rays, I applied Translucent Embossing Paste with the "Hexagon Confetti Stencil", making sure the embossing paste did not migrate to the bordering ray.


Once the paste was dry, I applied several shades of PanPastels to the rays and blended.  I love how the embossing paste resisted the PanPastel and how each shade of PanPastel blended with the other(s).

On each opposite ray, I adhered a piece of patterned paper and colored with another PanPastel color.

Special tip:  I 'set' my PanPastels with a few spritzes of water.  You can also use a fixative or hairspray to set the pastels so they do not rub off.


I then doodled on each of these PanPastel paper rays with Acrylic Paint markers and doodling pens.


Looks great, doesn't it?

To finish off my Art Journal page, I doodled a large sentiment on a ray 'painted' with PanPastels, then added a smaller sentiment, using "Alpha One" chipboard. 


What a fantastic impact, with nominal work.  I simply love using UmWowStudio stencils with PanPastels.  They are a match made in heaven!

Thank you for stopping by!  Have a great day!

Tina

Wednesday, June 11, 2014

This is the Life by Anai

Hello :)
Anai here with a very fresh spring layout made with UmWowStudio products and PanPastels :)

Last weekend I went for a little trip - there was a big polish scrapbooking convention in Warsaw, so I had a chance to meet with my creative friends. But my trip wasn't only about that. I wanted to spend some time with my friend and it turned out great. I had a chance to see amazing play at one of the theaters and it was really important event for me. The photo of the beautiful blond woman is from the play... whole scenography was sweet and in pastel colors - beautiful yellow flowers on the light violet/blue background... on the walls, on the floor, on the actresses dress. These scenography inspired me and I created my background in the similar colors.


My background is made mostly with PanPastels and very light acrylic paints. I used my favourite Circle Confetti mask, some doodling and stamps from the 7 Dots Studio "Illumination" collection.
I love Pan Pastels! They have a very unique effect - so soft and chalky.


"This is the Life" flair was just perfect for this layout. Not only because of the color. Not only because of the intensity of my last weekend ;) It also reminds me very strong about the play I've seen - it was bitter-sweet, very sad and difficult, but also it reminded me how important it is to enjoy the time we have!


UmWowStudio chipboards are always very fun embellishments to use. This time I covered them with beige paint, some Lindy's Stamp Gang mists and a bit of grey chalk ink. They look so amazing! I love how great they are for mixed media techniques!


I hope you like it :)
And remember - inspiration is everywhere. In the music, in the theater, in the fashion, and even on the wallpaper ;)

hugs
Anai

UmWowStudio Products:
Circle Confetti Mask
Life is Good Flair
Gear Mash
Distressed Harlequin Background


PanPastel Products:
430.8 Magenta Tint
470.8 Violet Tint
430.3 Magenta Shade
470.3 Violet Shade
340.5 Permanent Red

Friday, June 6, 2014

Bali Orchids by Manda

Hi everyone it's Manda here, fresh back from two glorious weeks in Bali, Indonesia. That of course means I have a whole stack of new photos to scrap! Today I am using the June sketch:

I decided to keep this one pretty simple because I felt like the photo was enough so other than the base paper and cardstock I kept pretty much to stamping and pan pastels. I started by using the orchid colour pan pastel and mixing it to look kind of like water colour. This was my first time using them so when I started out I wasn't sure how they would go but they are so simple to use that I am in love! 
I also did some stamping to reflect the circles in the sketch. I used one of the Soar Tags and painted it with some Heidi Swapp Color Shine Gold Lame to give it a metallic look because gold is one of the colours that will be repeating through my album for this trip. I added some pink twine from May Arts and I was done. A very simple page but I am really happy with how stunning it looks (I am even thinking of hanging it on the wall for a bit).

If you want to play along with the sketch check out THIS POST with all the details and how to link up.

Have a beautiful day - Manda xxx

Um Wow Materials:
Soar Tags 

Other Materials:
Pan Pastels
Paper - Carta Bella, American Crafts
Twine - May Arts
Embellishments - Crate Paper, Websters Pages
Stamps - Kaisercraft
Ink - Hero Arts, Prima, Heidi Swapp

Monday, May 26, 2014

two tags by Tusia Lech

Hello ladies :)

Today my turn to inspire you a little bit :) I created 2 tags using UmWowStudio products, May Arts ribbons, PanPastels and some more products.


Background was created with PanPastels and some stamps. I have added also a layer of vellum.


This tag was meant to emanate with love, so I have used Love Confetti chipboard pieces and The 2 of us flair.


The second tag is about lack of perfection. We should accept imperfection - we are humans, not robots :) And I wanted to created a small reminder of this :)


I have used UmWowStudio Circle Confetti chipboard and wonderful Wild flowers flair.


UWS Products:

Other companies products:
May Arts - ribbons
PanPastel - rich gold 911.5, Violet Tint 470.8 and Titanium White 100.5
7 Dots Studio - Nature Walk stamps, Nature Walk 6x12 Elements, Illumination Word Stickers, Messy Head 6x12 Elements, Hopefully Alpha Stickers

Wednesday, April 9, 2014

Project Life spread by Tusia Lech

Hello

It's Tusia Lech today. I would like to show you my Project Life - I have used lots of UmWowStudio products - chipboard pieces, flairs and a stencil. I will try to explain you, how I altered chippies and where you can all products.

In a spread below in upper-right corner you can see dots at the background - I created them using UWS stencil and PanPastel - Yellow Ochre 270.5.


Below you can see some detailed photos - first one shows Bee Knee's flair and Love Speech Bubbles chipboard covered with Lindy's Stamp Gang embossing powder.


"This happened" chipboard (from Arrow Title Mash set) is covered with gesso.


Love Speech Bubbles chipboard, you can see below, was covered with opaque, pink embossing powder.


Chevron confetti chipboard pieces was coloured with Distress Stain - Broken China. PL card below comes from 7 Dots Studio Illumination collection.


And here is another Project Life spread. I have used  dots and circles from Circle confetti chipboard set, which I covered firstly with gesso and then I embossed them with several colors of embossing powders.


And below I have used bubble covered with gesso and then sanded. It is perfect surface for hand writing.


I hope I inspired you to use UWS chipboards in creating your Project Life. Thank you for visiting UWS blog today. Have a great day!
Tusia

UmWowStudio supplies:
Circle confetti - chipboard
Love Speech Bubbles - chipboard
Arrow Title Mash - chipboard
Chevron confetti - chipboard
7 Dots Studio paper for PL: Illumination - Diversity