Friday, August 21, 2015

Love this


Hi everyone, it's Danielle here! Today I'm sharing a Summer layout with a picture that I took last week. I spent some quality time with my friend at a fun lounging place along the water. Always have been a water girl and I really enjoy watching the boats go by.

For this layout I used the Arrow Title Mash and Polaroid Mash chipboard sets. Usually I like to paint the chipboard, but because the Fancy Pants Summer Sun collection also has kraft elements in it, I liked to keep the chipboard just plain as it is. I think it really stands out this way.


I totally adore the Inspired flair buttons and I just had to add one to this page. The Day Dreamer one is perfect with this picture.

These are all the sets that I've used, with links to the store.


Thank you for stopping by and have a wonderful day!


Wednesday, August 19, 2015

Mini album with cicada by Olga


Hello ladies!

Today I will show you a really fast and simple way to decorate your kraft issue with interesting chipboard from UWS. 


The cicada bug was blacked with archival ink, many times embossed with clear pulver.


Some gesso, some stamps.. Some pieces from "Lost&Found" collection from 7Dots, some colors.. So is the cover done!


Be inspired!
Olga

Supplies from UmWowstudio:


Other supplies:

Mini album - HEMA
Stamps - Prima Marketing, Finnabair
Color sprays - Art Anthology
Stickers -  7Dots Studio, collection "Lost&Found"
Gems - Prima Marketing

Tuesday, August 18, 2015

Guest Creative Team Member : NUPUR PATEL

Hello folks -- today we have the talented Nupur Patel on the blog! I adore her clustery beautiful style and am super honored to have here sharing a beautiful 12x12 with us.


I am Nupur Patel, 23yrs old from Mumbai, India. Graphic Designer by profession and a scrapbooker by hobby. I was introduced to visual arts in my school years at Ecole Mondiale world School. Since then i developed a love for art, craft and design.After having learned and explored the handworks it was high time that I stepped into the Digital World to enhance my creativity, thus, leading to Graduating at Raffles Design International and later from Griffith University, Australia. Traveling, capturing and trapping memories are my source of inspiration to enter the world of scrapbooking.
It would be great to see you drop by my blog : Down the Memory Lane (http://downthememorylane9008.blogspot.com)

Hello Everyone!

Each day holds a surprise. But only if we expect it 
can we see, hear, or feel it when it comes to us.
 Let's not be afraid to receive each day's surprise, 
whether it comes to us as sorrow or as joy 
It will open a new place in our hearts, 
a place where we can welcome
 new friends and celebrate more fully.....

             - Henri Nouwen

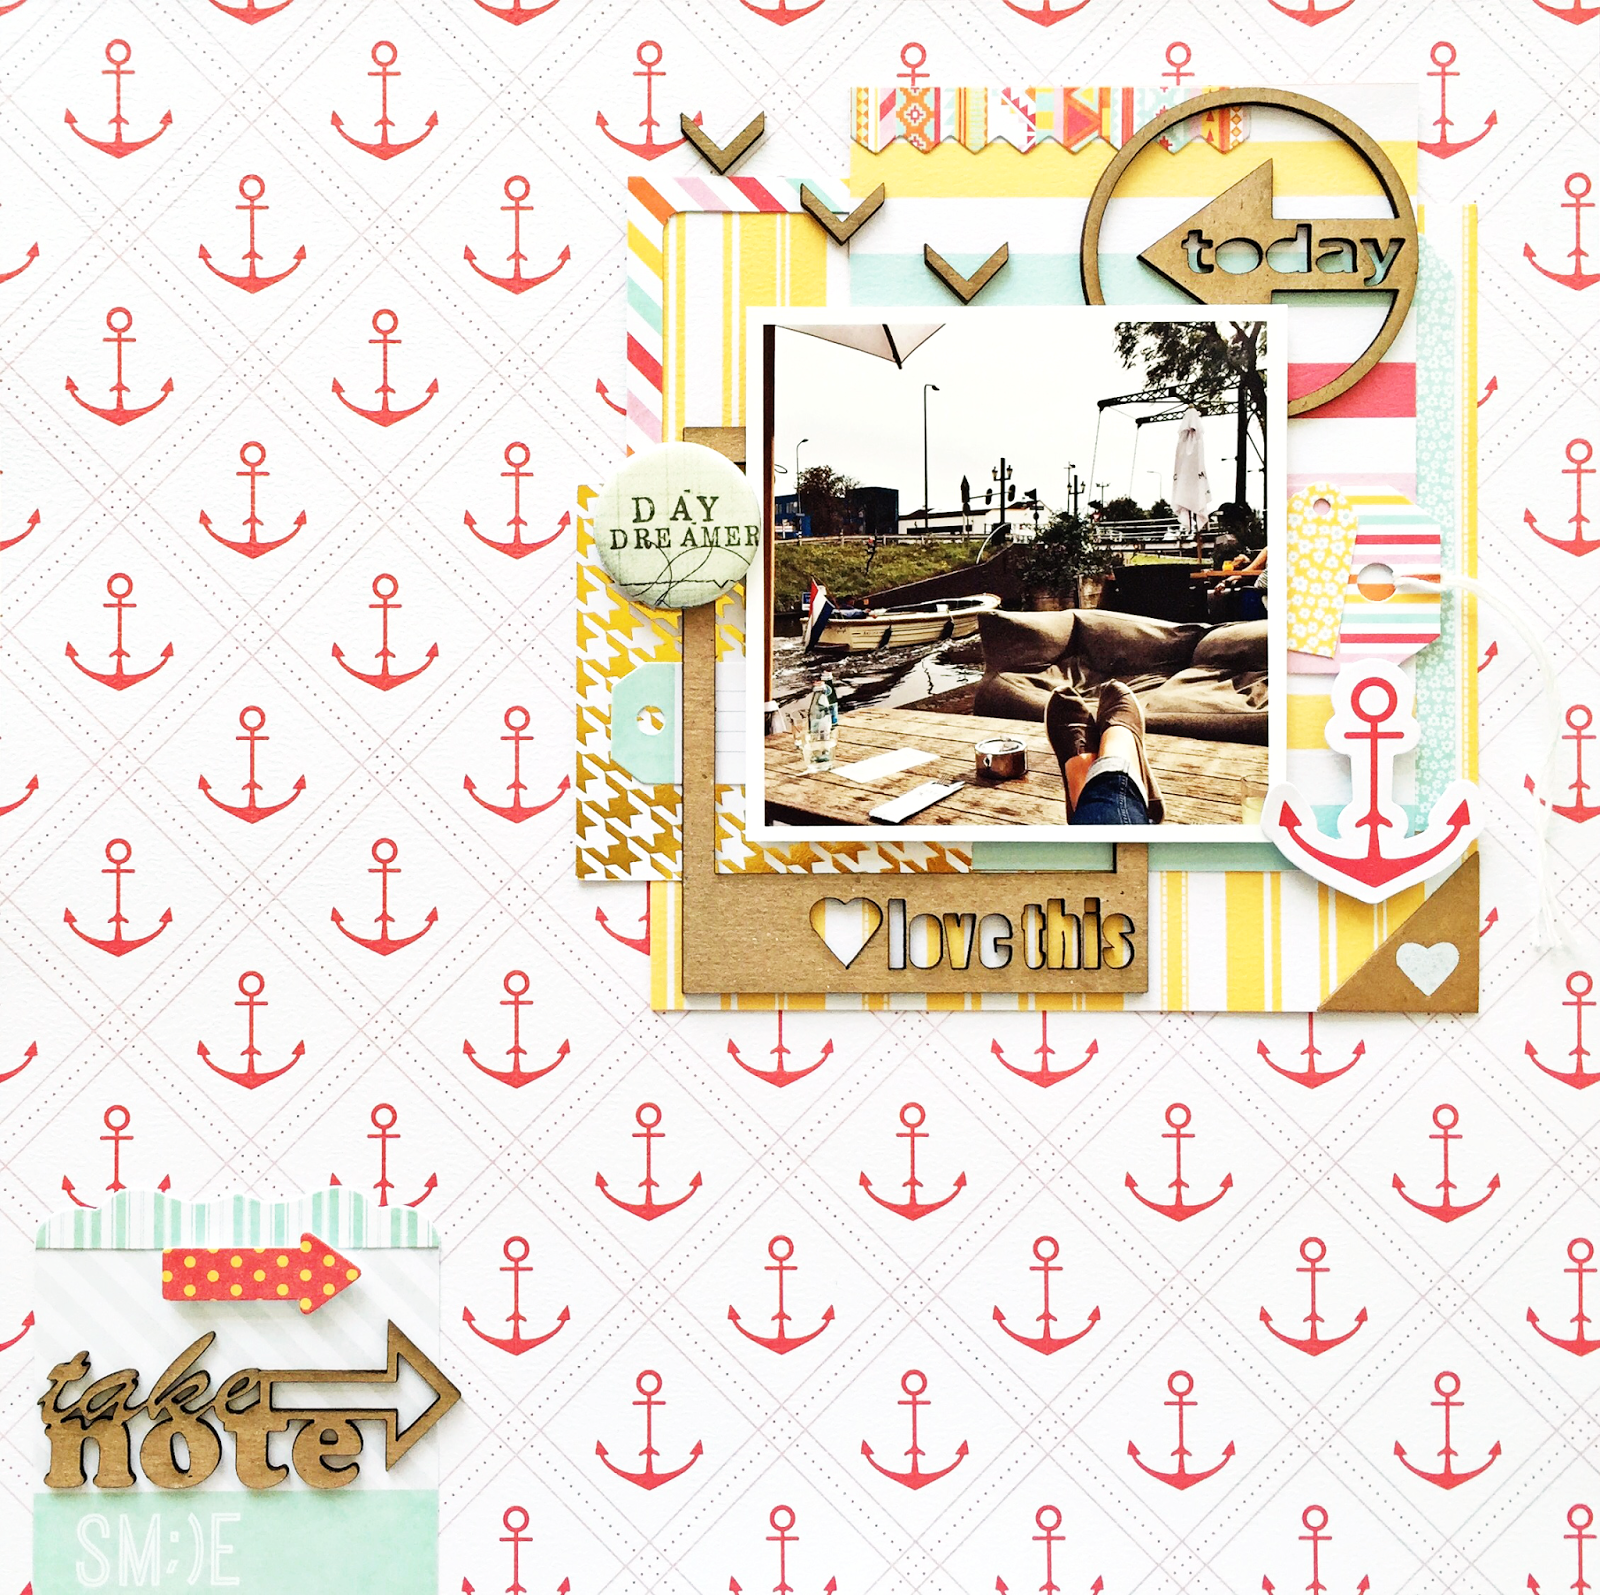
Here rolls in Celebrate Life!
Using the amazing nature loving collection
 "Nature Walk" 
The earthy feel, the soothing look, 
the calm colours all together takes you on a tour. 


The flair buttons are to die for,  I couldn't resist but use it.
The glossy finish, the look just adds that little magical touch to the layout
 including the amazing sturdy graphic chipboards, they are nothing less than a cherry on the top.


The arrows, the circles have been sprayed with the black mist to make it stand out.


- - - - - - - - - - - - - - - - - - - - - - - - - - - - - - - - - - - - - - - - - - - - -

The Products list:

Butterfly Kisses Flair

Arrow Confetti

                                
                            - - - - - - - - - - - - - - - - - - - - - - - - - - - - - - - - - - - - - - - - - - - - -

Thank you for stopping by
...Nupur Patel...

Wednesday, August 12, 2015

Mixed Media Layout + Start to Finish Tutorial by Kris Berc

Hello UmWowStudio fans!  It's Kris here today to share my very first project as part of the new creative team.  I thought it would be fun to include a start to finish tutorial for you- I hope you enjoy it :)

I had lots of fun playing with UmWowStudio goodies to create this layout of my daughter with her cousins.  Those girls can really lay on the sass haha!

Here are the steps to create this layout:

Choose a photo and set it down on your background paper in the area where you think you will adhere it.  Once you're satisfied with the location of the photo, use a pencil to draw some random circles around it (do not adhere photo yet).  Next, select some chipboard pieces from the Arrow Title Mash! set and set them down in various places on the page to get a general idea of your design.

 Place the selected chipboard pieces onto a craft mat.

Use a paint brush to cover the chipboard pieces with white gesso, then set aside to dry.

 Layer six pieces of patterned paper.  When satisfied with the arrangement, staple the layers together.

 Time to add color!  Prep the background paper by applying a layer of clear gesso onto it (this step not shown).  Let dry.  Then use sprays/mists to build layers of color on the background paper.  It's important to let each color dry completely before applying the next color.  I like to start with light colors followed by dark colors, so I used light purple first, then dark purple, followed by light blue, then a darker blue, and finally a light green followed by a darker shade of green.

Apply super heavy gesso through the Circle Confetti Stencil as shown; let dry.

 Time to add color to the chipboard!  Use clear embossing ink with coordinating colors of embossing powder and a heat tool to customize those awesome chipboard pieces.

Now you can glue everything down!

 Here's another look at the completed page.  As you can see, I left the "this happened" Arrow Title Mash! chipboard piece and the Damaged Punchinella Background chipboard pieces white.  I love the contrast!

Some closeups:

 I tucked a fun piece of flair, "be an adventurer", from the Oh The Places You'll Go Flair set, into this embellishment cluster.

 This is a closer look at the yummy dimension achieved with a piece of the Damaged Punchinella Background chipboard and gesso through the Circle Confetti Stencil.

 Here's the heat embossed arrow, heat embossed chevron, and gesso'd title piece from the Arrow Title Mesh! chipboard set.

 This is the balancing cluster on the lower left of the page.  More stencil work topped with a punchinella piece.

 Heat embossed chevrons and gesso'd punchinella piece on lower right of page.

and those sweet, yet sassy, girls!

I hope you'll give some of these products and techniques a try!

UmWowStudio products used:
Arrow Title Mash!
Circle Confetti Stencil
Damaged Punchinella Background
Oh The Places You'll Go Flair

other products:
patterned paper: Maja Design
flowers: Prima Marketing
sprays & embossing powders: Lindy's Stamp Gang
distress ink: Ranger

Monday, August 10, 2015

Chocolate box by Olga


Hello friends!

I love to give chocolate out! ;) But I want pack it well... Here is my self-made box for.


I have used paper from "Soulmate" collection from 7Dots.


The doily was destroyed, colored in orange..


Selfmade flower..


So will be giveaway not only yummy but beautiful too ;)


Be inspired!

Olga


Supplies from UmWowStudio:


Other supplies:

Paper - 7Dots Studio
Spray - Lindy's Stamp Gang

Friday, August 7, 2015

Summer canvas by Magali

Hi there,

I am really happy to be here for a new term with you and I hope you'll love my next creations.
Today, I want to share a little canvas, it's the first one I show you here.
It's about 6x6 inches and 2 inches thick.

 The quote is from Albert Einstein.

I always liked this quote and a friend of mine recently give me a mug with it... I found it very inspiring. Here is my process...
For the background I used Gelatos from Faber Castell, I love the bright colors they offer. I've drawn some circles creating an ombré effect. Then, I applied water with a brush, to soften the effect.

 I added the lettering with Decoupage glue.
I coloured my bicycle with black ink pad, just pressing the pad on the chipboard. I love the fact that the natural color of the chipboard is still visible. I did the same with the flowers.
 For the last part of the quote, I used a dymo label maker. I also added some stamps on the edges.
 After adding some iRESISTible ink splashes, here is the final result.

 And here are the UWS I used:

And other products: DoodleBug letters, Dymo