Showing posts with label life is good flair. Show all posts

Tuesday, August 9, 2016

Be the Hero Card with Olga


Hello friends!

Today I'm here without chipboard but with mask and stencil! UmWowStudio makes wonderful stensils! And the flairs are amazing!

I have started with the tearing apart the 15x15 paper from Homegrown collection from 7Dots Studio. And then putting together the parts ;)


Then I have given the medium over the stencil and scattered the black glitter on it.


After drying I have glued the tags, elements, phrase, flair and black wire to the card.


Now I have added splashes with acrylic paint and glued the selfmade flower on the top.


Some acrylic gems to then and the card is done. Ok, I have sketched some lines on it.. So, the card is done yet!!


Simple and wonderful! Happy creating!!


Supplies I used:

Life is Good flair set


Wonky Circles Stencil


Stay creative!

Friday, November 27, 2015

Boat trip to Ship Island


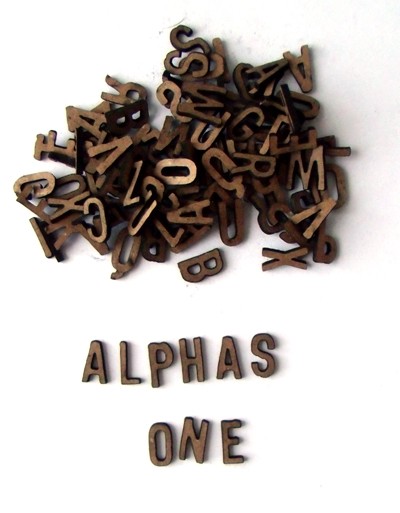
Hello everyone, it's Danielle here today! I used up my last bits and pieces of the Pink Paislee Citrus Bliss collection, to go along with a Documented Hashtag Banner, Flair, Arrow Confetti and the Alpha One. I used the Alpha One for most part of my title and painted it yellow. The other chipboard pieces are used plain.


Thank you for stopping by and have a creative weekend!

Friday, October 16, 2015

Beach life


Hello everyone, it's Danielle here. For the layout I'm sharing with you today, I wanted to try something new with the chipboard elements: I gold-foiled them with the We R Memory Keepers Heatwave tool. I've made a video to show you how to do it, you can find it overhere on my youtube channel.

Besides the UWS chipboard elements and flair buttons, I used the Dear Lizzy Documentary collection.


Thank you for stopping by and have a fabulous weekend!

Monday, April 20, 2015

Our girl by Tusia Lech

Hello sweet fellow scrappers :)
I am here today with a layout - I love to make layouts with photos of my sweet little daughter. She loves elves and she is so very girlie! Much more than I was when I was her age. It is so cute!


I have used cute little chipboard hearts from Heart confetti chipboard set. I covered all pieces with white embossing powder.


I decided to use circle pattern as main shape on my layout, so I have chosen background paper with dots, I have used round die-cut elements and stickers. I have chosen two beautiful flairs from Life is so good flair set and Our princess flair.


I decided to use circle pattern also at the background paper. I applied red PanPastel through Circle confetti mask from UmWowStudio.


Thank you for visiting UmWowStudio blog today!
Tusia


UmWowStudio supplies:
Life is so good flair
Our princess flair
Heart confetti chipboard
Circle confetti mask


Monday, March 16, 2015

Blue and green


Hello :)
Today my card with blue and green shades, 
messy and crazy as always :)


I used:


Here are some details;


Have a lovely day :)


Wednesday, February 25, 2015

Hi - card and a tutorial by JaMajka

Hello!

This is JaMajka here :)
I would like to show you a card, very easy to make.
Color options is your choice :)
Mine was pink/white.


I used some UmWowStudio chipboards and a mask and flairs set:


And now I'll show you, how I created this card:

1. I prepared white cardstock, scrapbooking paper, 
gesso, chipboards, embossing powders, color mists,
mask, flairs set, silicone brush or something similar to apply gesso.


2. I've cut my cardstock to fit to my card base size.
 I covered it with gesso.


3. I used some color mists, just as you want -
color all cardstock or just splash somewhere with color.


4. My cardstock base is done - it has some splashes and stains.
Now it's time for a mask, embossing stamp pad and
embossing powder - just tap with embossing ink wherever you want.


5. Just like that (I've mixed light and dark pink)


 6. That's the effect.


7. I'm composing the card and I'm preparing my chipboards.


8. I covered chipboards with embossing powders (2 layers).


9. My composition is finished, 
now it's time to add some main elements.


10. My cardstock base is glued into my card base (made of craft paper).
I've added some glass cabochons and some liquid pearls.


My card is finished,
here you can see some details and close-ups :)