Showing posts with label brick mask. Show all posts

Tuesday, June 16, 2015

ATC with a sparkle tutorial

Hello :)

Today I would like to show you, 
how I used metallic wax and sparkle texture paste 


I prepared:


I used sparkle texture paste first, 
applying it on the chipboard with brick stencil.


On the other butterfly wing
I applied metallic wax with my finger.
It has a beautiful shine.


I prepared my ATC bases.
I covered them with shiny mists.


I used background stamp and brown ink.


I glued butterflies on my ATC bases.


And I decorated my ATC's a bit :)
I used scissors stamp and white ink pen.
I used glass cabochons as well.
And these are my ready ATC's :)


Take a closer look.
Look, how my ATC shines!!!


Have a lovely day :) 


Monday, March 16, 2015

Blue and green


Hello :)
Today my card with blue and green shades, 
messy and crazy as always :)


I used:


Here are some details;


Have a lovely day :)


Wednesday, February 25, 2015

Hi - card and a tutorial by JaMajka

Hello!

This is JaMajka here :)
I would like to show you a card, very easy to make.
Color options is your choice :)
Mine was pink/white.


I used some UmWowStudio chipboards and a mask and flairs set:


And now I'll show you, how I created this card:

1. I prepared white cardstock, scrapbooking paper, 
gesso, chipboards, embossing powders, color mists,
mask, flairs set, silicone brush or something similar to apply gesso.


2. I've cut my cardstock to fit to my card base size.
 I covered it with gesso.


3. I used some color mists, just as you want -
color all cardstock or just splash somewhere with color.


4. My cardstock base is done - it has some splashes and stains.
Now it's time for a mask, embossing stamp pad and
embossing powder - just tap with embossing ink wherever you want.


5. Just like that (I've mixed light and dark pink)


 6. That's the effect.


7. I'm composing the card and I'm preparing my chipboards.


8. I covered chipboards with embossing powders (2 layers).


9. My composition is finished, 
now it's time to add some main elements.


10. My cardstock base is glued into my card base (made of craft paper).
I've added some glass cabochons and some liquid pearls.


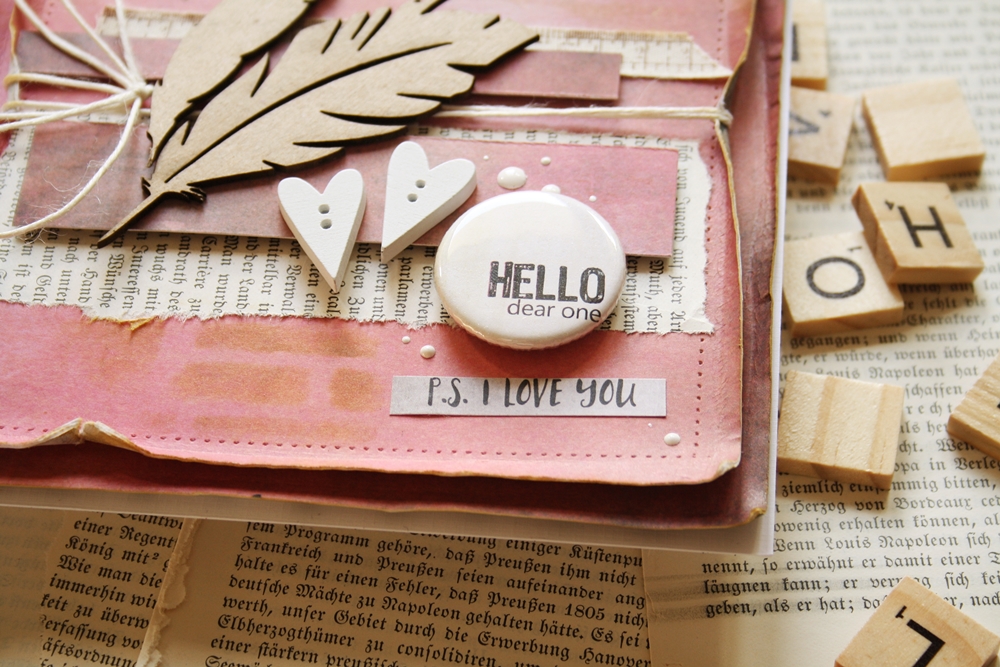
My card is finished,
here you can see some details and close-ups :)


Wednesday, August 20, 2014

Temple Bayon by Miae

Hello all!

Have you ever been to Cambodia and wandered among the many temple ruins? We had an opportunity to do so last year and one of the amazing, standout temples we explored was Bayon. Here I'm sharing with you a photo of one of the many stone faces that grace Bayon's towers.


I wanted to create a page with an ancient feel. I loved the way the Brick Mask helped me do just that with the background. I used paper from 7Dots Studio Love is in the Air collecton, took an Oil Bar to the Brick Mask and created the background.


Next, I took the square chipboard from Layered Squares and cut them down to create rectangles (more along the lines of the bricks). To given them a more rough, stone look, I dabbed them with molding paste, then painted them with metallic watercolors.


There are jungles all around the many temples in Cambodia so I wanted to add a floral element to my layout. I took chipboard from the Floral Collectioin and painted them with Distress Crackle paint.


I hope you find some inspiration here!

Supplies:


7Dots Studio Love is in the Air
Prima Blossom Branches Walnut
Stampers Anonymous Floral Tattoo
Inkadinkado Floral Damask
Distress Crackle Paint