Hello folks! today we have the talented Anna Rogalska joining our team for a brief stint as a Guest Creative Team Member. She always has the most elaborate stunning layouts, and I'm excited to feature her for a day!
Hi Everyone! I'm Anna Rogalska. I live in Poland. I am a landscape architect, scrapbooker and in my spare time I am a keen runner. I've been scrapbooking for nearly 6 years. My scrapping style is a little bit of everything, romantic, a little shabby and mixed media. I love to try new techniques!
I make layouts, cards, tags and altered items. I am definitely a flower addict! I absolutely love flowers, chipboard, stencils and paints which are usually incorporated in most of my layouts
I am very excited to be here to share with you a project I created with UmWowStudio products. Thank you DeeDee for having me :)
..You can find me here: annar-mojepasje.blogspot.com
Today I am sharing with you a layout about flowers in my garden, because flowers are my biggest love! I am completely addicted to plants and gardening.
I created a layout using my favourite 7 Dots Studio Nature Walk collection and gorgeous UmWowStudio chipboard pieces like: Doilies, Distressed Harlequin Background and Love This Arrow Title.
My background is made mostly with 13arts mediums like purple mists and paints. I love this color!
UmWowStudio Products:
Doilies
Distressed Harlequin Background
Love This Arrow Title
7 Dots Studio - Nature Walk - Winged Vines paper
7 Dots Studio - Nature Walk - Clear Stamps
and from others:
13arts: gesso, modeling paste, mists and paints
Prima stencil
Friday, August 29, 2014
Tuesday, August 26, 2014
Scary Weather!
Hello friends and bloggers....Welcome!
Geraldine here today, to share two of my latest tag creations.
Here at UmWowStudio we recently had a fabulous Blog Hop and I was inspired by some of the gorgeous tags that DeeDee Catron had made - couldn't resist looking at them as they were both fabulous..... so for today I decided to share that inspiration that led me to making this set.....
Together they are called ~ 'Scary Weather'
Yes -I know I have used those Spooky trees again - Oh how I love these, so how could I resist anything to do with nature?
UmWowStudio products used:
I have also used lots of other mediums to create these:
Shimmerz textures, Tim Holtz Crackle paint, Distress glitter, twine and various distress inks.
7 DotsStudio - Cold Country paper.
Hope you have enjoyed my post and see you in September!
Geraldine.
Monday, August 25, 2014
Good stuff
Good morning friends,
I fell in love with so many of the new UWS releases this past month, but one of my favorites that I could not wait to get my hands on was the Rainy Day Flair. A few weeks ago, the lawn sprinklers in our housing community started coming on during the day. Being the fun, unexpected situation it was, I let the girls run crazy through it, in their clothes. Of course I had to grab my camera, creating the perfect photos to showcase these amazing .
Brianna
UmWowStudio products used:
Arrow Confetti
Snowflake Confetti
Rainy Day Flair
I fell in love with so many of the new UWS releases this past month, but one of my favorites that I could not wait to get my hands on was the Rainy Day Flair. A few weeks ago, the lawn sprinklers in our housing community started coming on during the day. Being the fun, unexpected situation it was, I let the girls run crazy through it, in their clothes. Of course I had to grab my camera, creating the perfect photos to showcase these amazing .
I wanted to create the raindrops in a multitude of colors and chose to stagger my UWS Snowflake Confetti burst shapes throughout the bottom half of my page. It was just the pop I was needing. I chose to keep them unaltered for a contrast in colors!
I added my Flair button onto a simple stories sun and cloud print, the perfect look for sprinklers in the sunshine. Last off I added three arrows in varying sizes from my Arrow Confetti.
I had so much fun creating this layout and I hope it inspired you to grab some of these super fun.Brianna
UmWowStudio products used:
Arrow Confetti
Snowflake Confetti
Rainy Day Flair
Friday, August 22, 2014
pocket pages by Tusia Lech + video
Hello UWS fans :)
UmWowStudio products:
Happy Hello Pocket Chip
Checker Board Mask
Wood Grain Mask
Today Chevrons Pocket Chip
Tusia Lech
Here is Tusia Lech. For my today blog post I prepared a spread with gorgeous Pocket Chip pieces. I made also a video to show you, how everything was created.
Below you can see a close-up with Happy Hello Pocket Chip covered with embossing powder.
On the background paper I applied gesso through UmWowStudio stencils - Checker Board Mask and Wood Grain Mask.
Here you can see a chipboard from Today Chevron Pocket Chip set.
And here you can watch the video with a whole process of creation - enjoy :)
Happy Hello Pocket Chip
Checker Board Mask
Wood Grain Mask
Today Chevrons Pocket Chip
Tusia Lech
Thursday, August 21, 2014
Gear Mash Up Mini Canvas
Hello and Happy Thursday! Tina Walker here today with a new project for UmWowStudio, a mixed media canvas!
Gears are a great design element, and the Gear Mash collection from UmWowStudio is the perfect set to create a gear project!
My mixed media canvas was a fairly simple and quick project. You can create immediate dimension to any canvas project by stacking canvases.
To create the background canvas, I added modeling paste directly to the burlap canvas. Once it was dry, I sprayed the canvas with Gold Spray Paint. I wanted a bold color statement, so I added 3 strips of May Arts ribbon. I really love how the ribbon added quick texture and interest.
To build my focal canvas, I added modeling paste and gold spray paint as with the large canvas. I then pre-prepared the gear chipboard with a coat of gesso and several colors of sprays and paints.
I adhered the gear chipboard to my smaller canvas, layering them for dimension. Once I was happy with the gear chip placement, I added more sprays and paints, pulling the entire canvas together.
I used word stickers for my sentiment (super easy and quick) and some twine to finish it off.
Creating mixed media projects does not need to be time consuming or difficult. Using basic supplies and customizable UmWowStudio chipboard makes it fun!
Thanks for stopping by! Have a great day!
Labels:
Gear Mash,
Mini Canvas,
mixed media,
Tina Walker
Wednesday, August 20, 2014
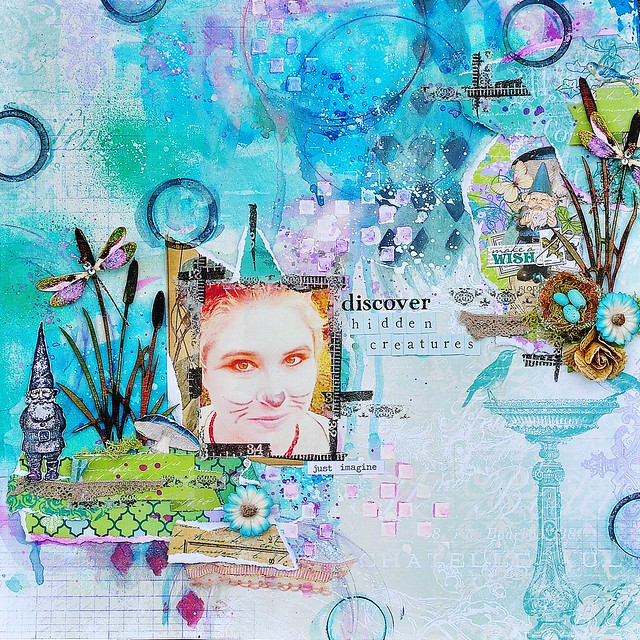
Discover Hidden Creatures
 Hello! It's Amy here today, to share a layout I made, with a fun, whimsical and lighthearted feel!
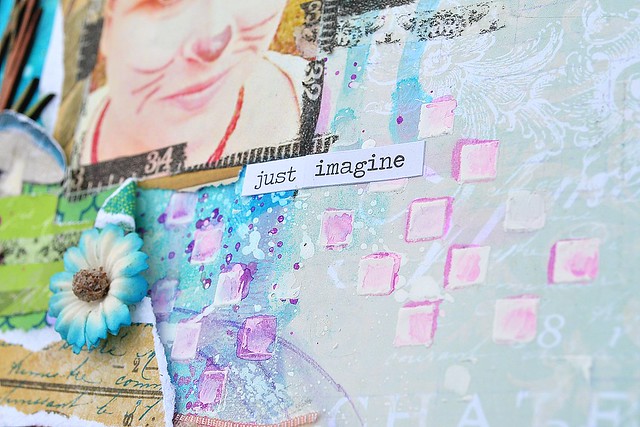
I started by creating my background with mists and watercolors/watercolor pencils. I laid down the harlequin mask, and used black ink to give some contrast. To give some texture, I used the checkerboard mask, and rubbed on some 13 Arts gesso (it's nice and textural/substantial) using my fingers. Adding watercolor over the gesso (once dry) gave a little splash of color as well.

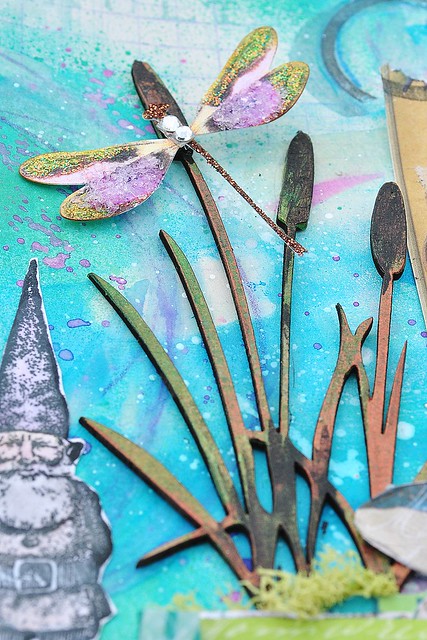
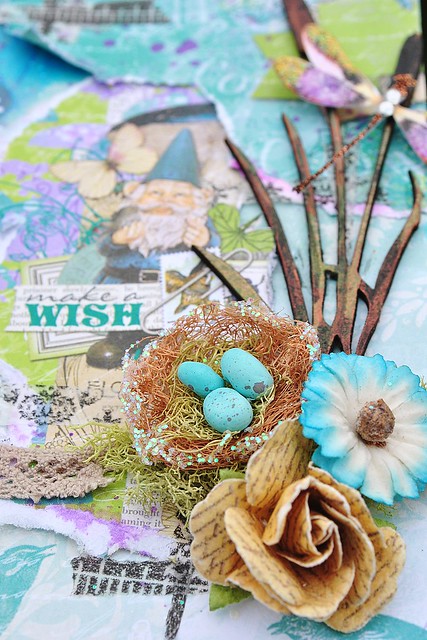
After layering up some papers and fibers, I began to embellish. I painted the cat tails chipboard pieces, adding some moss underneath for a natural look, as well as flowers and the beautiful embellishments, like the dragonflies and bird nest. All of these (and the papers) were in July's Scraps of Darkness kit, "Believe."
 I love how this layout shows my quirkiness (I painted myself as a fox for Halloween last year), and my love for gnomes and other great fantasy woodland creatures. :)
Thanks for having a look today, and lots of artsy crafty gnome sparkle blessings are being sent to you!
Loves,
Amy
Supplies:
UmWowStudio- Stencils- checkerboard, harlequin; Chipboard-Cat Tails
Papers and Embellishments: Scraps of Darkness July Kit, Believe
(BoBunny, Prima Marketing, Renea Bouquets)
Stamps-Viva Las VegaStamps!
Paints-13 Arts, Sakura (watercolor), Faber Castell (watercolor pencil)
Mists-13 Arts, Tattered Angels
Washi Tape-Tim Holtz
Fibers-Webster's Pages
Temple Bayon by Miae
Hello all!
Have you ever been to Cambodia and wandered among the many temple ruins? We had an opportunity to do so last year and one of the amazing, standout temples we explored was Bayon. Here I'm sharing with you a photo of one of the many stone faces that grace Bayon's towers.
I wanted to create a page with an ancient feel. I loved the way the Brick Mask helped me do just that with the background. I used paper from 7Dots Studio Love is in the Air collecton, took an Oil Bar to the Brick Mask and created the background.
Next, I took the square chipboard from Layered Squares and cut them down to create rectangles (more along the lines of the bricks). To given them a more rough, stone look, I dabbed them with molding paste, then painted them with metallic watercolors.
There are jungles all around the many temples in Cambodia so I wanted to add a floral element to my layout. I took chipboard from the Floral Collectioin and painted them with Distress Crackle paint.
I hope you find some inspiration here!
Supplies:
7Dots Studio Love is in the Air
Prima Blossom Branches Walnut
Stampers Anonymous Floral Tattoo
Inkadinkado Floral Damask
Distress Crackle Paint
Monday, August 18, 2014
Steampunk Necklace with Jen
I've got another wearable art project for you! I had so much fun creating the Hexagon Necklace from last month, that I made another using an UmWowStudio Doily!
I loved the natural color of the chipboard doily so I left it alone! I added lots of fun embellishments and an artsy center.
I took the Cold Porcelain clay from the Faber-Castell Design Memory Craft Mixed Media with Gelatos kit and mixed some with the Gold Champagne Gelato® and pressed it into a mold for the wings.
I used other products from the kit to create the center art. I wanted texture and drama for the necklace. I have more information about the process on this project on my blog.
I love to use UmWowStudio's chipboard pieces for all kinds of art but this one is perfect for a dramatic wearable art piece! I hope I inspired you to create different types of art with these amazing embellishments!
UmWowStudio Product:
Supplies:
Gears: Tim Holtz
Brads: Prima Marketing
Beads
Hinges
Jump rings: Prima Marketing
Chain: unknown source
Beacon FabriTac adhesive
Friday, August 15, 2014
Guest CT Member : Michele Kosciolek
Hey folks! :)
Today we have SUPER FAN Michele Kosciolek visiting us with a superb altered book! I'll let her take over form here ;)
Today we have SUPER FAN Michele Kosciolek visiting us with a superb altered book! I'll let her take over form here ;)
Michele here and I am an aunt, a daughter, a sister, a friend and
an UBER fan of Um Wow Studio! Born and raised in Michigan, I found my
way back almost 8 years ago after living in California for over 15
years. I think someday I will find myself back in California but no
matter where I land I LOVE to create!!!
A very dear friend of mine lost his father recently
and asked me to do something special with an old photo. I have been
waiting for the perfect idea to come to me and it finally did...I used a
vintage book to create a frame for the photo.
Items used:
UmWow Studio- banner mash, gear mash, DIY printers blocks, checkerboard mask, harlequin mask, ATC frame-movie and flair for the love notes set.
VLVS!-clockface
Prima- flower, brad and pebble
Vintage bits- gears, clock hand, scrabble letter and film negative
Tim Holtz- film strip, light bulb, archival ink and distress ink
Misc- mod podge, inka gold, metal pull and metal flourish
Wednesday, August 13, 2014
Road Trip with Rhonda
Happy Wednesday to you! It's Rhonda here to host the blog for you today.
I have a confession, I have some favorite chipboard elements and I was hoarding one of them. Do you ever have a piece or two that you just love like that?
I have a confession, I have some favorite chipboard elements and I was hoarding one of them. Do you ever have a piece or two that you just love like that?
We recently took a family vacation and I wanted to grab a few images that my husband shared on FaceBook.
Road Trip!
The View Finder inspired my page, I decided to add some funky pattern paper to back it so it looked like there was film in it. I coated it with Radiant Rain in Pewter.
One of the Layered Arrows was base coated with cream paint and I stamped an ampersand on it. The Confetti Heart was inked with a Cherry Red Ink.
UmWowStudio Products:
Other Products:
Souvenir Pattern Papers by BoBunny
Navy Cardstock by Core'dinations
Kraft Cardstock by The Paper Company
Stamp and Button by BoBunny
Enamel Dots by Basic Grey
Twine by The Twinery
Other: Sequins, Thread and Sewing Machine
Thanks so much for stopping on over to the blog today! What's your favorite UmWowStudio item right now? Perhaps you've guessed but one of mine is the View Finder.
~ Rhonda
Adventure Awaits!
Hello and Welcome friends!
Today I'm sharing a fun layout with photo's of a more whimsical theme - Alice in Wonderland.
I have used lots the gorgeous 'New Nature' UmWowStudio chipboard that I just cannot resist but in a lighter palette for a change....Out with the Goth and in with the whimsy!
'Adventure Awaits'
I love to cover chipboard in crackle paint and then I use various inks to add just hints of colour
and highlight the cracks - to create one of a kind pieces of chipboard.
UmWowStudio Products:
Hope you have enjoyed looking at my layout and continue to see some stunning and inspiring projects that the Creative Team have to show here on the blog!
Till next time. Geraldine!
Monday, August 11, 2014
30
Good morning friends.
I recently celebrated my 30th birthday. I wanted to capture the fun of this landmark with an equally fun layout. I have been playing a lot more with my art supplies on layouts, and had the idea to swap paper colors with opposite paint colors. Using my paints as a photo mat, I swapped the colors for a fun look.
I knew right away that I wanted to use a large UWS speech bubble frame as a statement embellishment. I had splurged on Martha Stewart micro beads when they first came out, and have yet to truly use them. I chose to cover my frame in gold micro beads for just the right pop of bling that I was going for.Keeping with the gold theme, I chose to cover my chosen celebrate confetti with my gold ink pad. Isn't that mini balloon just perfection for a birthday layout! I came across this Dr. Suess quote online and felt it perfect for this page. I chose to carry it along my paper bubbles for an added playfulness and movement.
Thank you for checking on our new project! I hope I inspired you to play with your paints an old embellishments, making them new again!
Brianna
UmWowStudio Product used:
Friday, August 8, 2014
be happy by Tusia Lech
Hello :)
Sometimes everyone needs a reminder, to be happy. Even the most smiled and positive person. Sometimes there are days, when not everything goes well. I created this mini book as a reminder for myself :)
On the cover I placed wonderful flair from Sidewalk Chalk set. But before I did it, I created background using gesso and VivaLasVegas stamps (six hexagons, .washi chevron)
UWS Scallop tag book is a wonderful base - I love the thickness and the color!! You can easily use white or black media on it and everything looks just great!!
I have used 7 Dots Studio stickers and die-cut elements from Illumination and Nature Walk collection. The quotes are very inspiring!
I have added some sequins, some thread, couple of crystals and metal embellishments.
When you buy any UWS tag book, you receive also big binding ring so you can add more pages or create really dimensional piece of art.
"Feed your soul", "Love the life you love", "See good in other people" - uplifting messages changing the energy surrounding the one, who reads it.
Such a small tag book could be also a great gift to a friend. Everyone can make the difference in the world, even with something that seems to be quite small.... "A butterfly effect". Remember it.
Tusia Lech
UmWowStudio supplies:
Labels:
7 dots studio,
scallop tag book,
star confetti,
Tusia Lech
Subscribe to:
Comments (Atom)


.JPG)
.JPG)
.JPG)
.JPG)


