Showing posts with label mini album. Show all posts

Monday, July 28, 2014

A Little Bit O' Steampunk

cover full, uws, allassiter
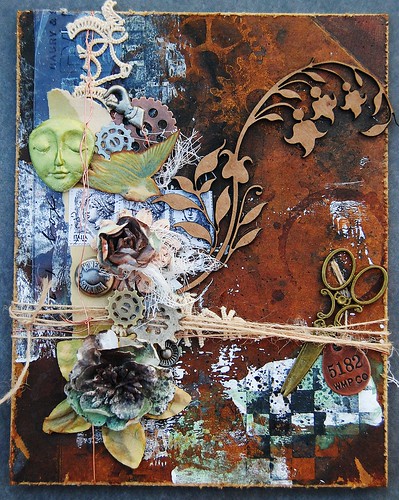
 Hello UmWowStudio fans! It's Amy here today, to share a mini book cover. I was wanting a little book to house photos of our move from Kansas to Iowa, and I saw in my stash, I had a couple of 7 Gypsies book covers. I set straight to work with my paint, stamps, and UmWowStudio chipboard bits.
chip close, UWS allassiter
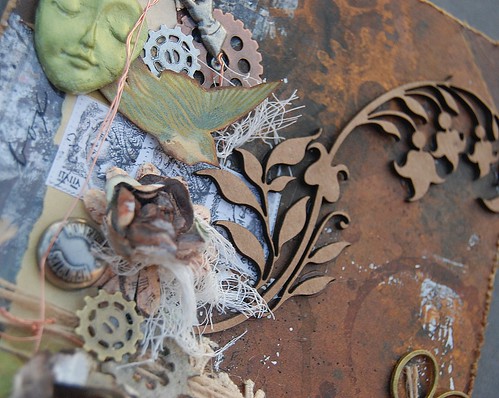
This was the first project I made right after moving, and I was needing to let go of some creative energy that had been building up....so I was not thinking much about the design, just keeping things in an L shape, and adding freely. Adding the Floral Flourish, my first UmWowStudio love (really, I am pretty sure I've used this piece about 10 times at least) gave a nice moving focus to the small 6x6 cover.
I hope to share future pages in the interior of this book, a little "moving journal."
Thanks so much for having a look today!
Loves,
Amy

Supply List:
UmWowStudio: Chipboard-Floral Flourish
Stamps: Viva Las VegaStamps!
Flowers: Prima
Metal Bits: Bead Landing, Finnabair (Prima)
Paper: 13 Arts, Jenni Bowlin Studio
Twine: May Arts
Ink: IMAGINE Crafts, 13 Arts

Thursday, May 22, 2014

Nancy Wethington!!

I have been meaning to share this for .. literally.. 2 weeks now. And I am SO SORRY it's taken me this long...


...


But feast your eyes upon the glory of NANCY WETHINGTON!

She's got the most amazing post on her blog where she's used our Bracket Waterfall Tag Book and the 7 Dots Studio NATURE WALK collection!

The full album:


But you'll be disappointed if you don't HEAD OVER and see each page individually!

Like this beautiful page also using our Side Mount Lamp:


I'm so giddy over this book.

Tuesday, March 11, 2014

"Remember this" - mini album

Hello :) Anai here with my first UmWowStudio post.
Today I'd like to show you mini album I made with a "Nature Walk" collection and some other UmWowStudio supplies.


"Nature Walk" is a very beautiful collection with a lot of elegant images and a little vintage feeling.
All the elements match together perfectly, so making this album was easy and the result is in my opinion very elegant.


I used almost all the elements from the collection - papers, stickers and die-cuts.
Then I added some chipboards. I really love our mini "confetti" chipboards - they can be used in so many different ways!
I used white acrylic paint to soften their color just a little bit and then added Silks Acrylic Glaze on top. The effect is just stunning :)


I also used Star Confetti Mask with the molding paste. As you can see stars are small, cute, very sharp and they match the whole design perfectly.


There are 10 5x5 inches pages inside my mini album. Every one of them is decorated with a "Nature Walk" papers.


I just simply cannot wait to go on some spring walk in my city to take some photos and put them in the album together with this beautiful collection.
Anai

UmWowStudio Supplies:
Nature Walk Musical Blooms 12x12 Paper
Nature Walk Songbird 12x12 Paper
Nature Walk Winged Vines 12x12 Paper
Nature Walk Gray Day 12x12 Paper
Nature Walk Cotton 12x12 Paper
Nature Walk Cloudy 12x12 Paper
Nature Walk Diecut Tags
Nature Walk Diecut Elements
Nature Walk Elements Stickers
Nature Walk Words Stickers
Hexagon Confetti
Gear Mash
Star Confetti Mask
Love Notes Flair

other supplies:
Distress Ink "Vintage Photo"
Claudine Hellmuth Studio acrylic paint "Blank Canvas"
Liquid Pearls "Buttercup"
white Ecoline paint
Silks Acrylic Glaze "Golden Monarch"
Silks Acrylic Glaze "Coral Berry"

Friday, June 14, 2013

The little things {A new page in my mini!}


Good morning friends!! 

Today I'm sharing a new page in my Little Things of 2013 mini album. 


We got out first haircut this year, and as that might need documenting on a nice 12x12 format, I thought the bedhead before the cut was something to be held onto, also. ♥


I used the brand new Film Reel Countdown set of flair and Chevron Confetti from UmWowStudio. The alphas are from Echo park, the ribbon is May Arts, and I used Helmar's Acid Free Glue to turn the picture into its own page by covering the whole backside with glue and jut covering one of my existing pages. GREAT Illusion :) (There's a whole week of Helmar Acid Free goodness going on so check it out!)


I finished off this baby with a little doodling from my favorite pen :)

Wednesday, May 29, 2013

A Super Cute mini album {By Chrissy}


Afternoon :) Chrissy has a super fun and super bright mini album to share with us today! I'll let her take over from here:

Hi folks!  I am so excited to be working with DeeDee and the rest of the talented gang here at UmWowStudio.  


I have a mini album to share with you today.  I made this for my niece and since she is such a ham, I wanted to use fun and bright colors.


Here's the inside of the album


Want to see what I did with the fabulous chipboard?  The butterfly on the cover is pretty straightforward.  I left the layers as they were meant to be then painted the top layer with gesso and applied a fine iridescent glitter.


For this butterfly, I applied a coat of gesso then sprayed it with some Color Shine in "Georgia Peach".  When it was almost dried, I added a layer of glass bead gel.


For the floral embellishment, I decided to try and layer a couple different mediums.  The base layer is gesso then acrylic paint.  Once the paint was dried, I added blue glitter onto the flowers.  Here's where the fun is.  For the stems, I added a layer or Bombay India Ink.  Talk about color enhancement!


This star looks really cool.  It looks like it's covered in lace but it's not. That is washi tape!  I just taped over the star then trimmed the edges.


Can you tell I love playing with the chipboard?  There's really so many ways to alter it.  Just dive in and get messy!

Friday, May 24, 2013

The Little Things of 2013 {ScorPal & May Arts}

Hi everyone!!

Welcome to my stop on the May Arts and ScorPal blog hop! 


You should be here from one Steph Ackerman.

Today I have to share with you a mini album that I recently started commemorating the small things that have happened (and some that will happen) in 2013! 


The album has been put together with a scoring technique I recently picked up from the Fold It In Workshop by Kristin Tweedale. My Scor-Pal was a GEM and is literally the backbone of this mini album. The album is based from the Indie Chic collection by MME. It also includes Thickers, EP alphas, Charcoal Glimmer Mist from TA, a dymo label maker, Star Confetti from UmWowStudio and Gauche Alchemy ouchless cardboard in white. The cover has been  finished with a Turquoise Chevron ribbon, a White Leaves ribbon, and some natural twine from May Arts.

I have two inside pages to share today, as I'm filling about half of it and holding onto the other half for the rest of 2013 :). 


This page is of my kiddo and his daddy, Gabe is walking on William's feet at the mall! The page is the ouchless cardboard by GA mentioned earlier (punched out of a sizzix die), the washi tape is also GA. The brad and paper for the rosette are MME. The rosette has been scored on my Scor-Pal. The ribbon behind the rosette is the same chevron used before by May Arts, but in a super fab bright yellow color. I also used more confetti stars from UmWowStudio. 


This one is of Gabe sleeping with his eyes open... I took this picture with FLASH and he still didn't wake up, lol. It has been doodled on and also has confetti stars and a label maker title. The stamps are from Viva Las VegaStamps! (line of chevrons).

I'm having so much fun on this baby and can't wait to show the full reveal! Stay tuned throughout the year to see more and more pages completed. 

Don't forget to comment for the giveaway!

Now head on over to the blog of Toni Storie to see what's next on the hop!!

Thursday, January 3, 2013

Dream Big


(Check back later today for your first sneak peek of Aflutter!)

Today I'm sharing my post from yesterday's May Arts blog post. 

I made an inspirational New Years mini book. and I'M SO IN LOVE WITH IT! I think I needed to get some stamping out of my system... It uses an UmWowStudio flower, TONS of May Arts ribbons, TONS of Viva Las VegaStamps! images, a bit of MME paper, some TA Glimmer Mist, some Ranger Ink, a bit of Gauche Alchemy tape, paper clips, a doily, a binder clip, and the pages are made from unlined note cards. 


There's a Video on the May Arts blog going through each page. Or finish reading here to see the sets of pages and their supplies!

May Arts: Sheer Box Pleat
Tattered Angels: Inchworm Chalkboard 
Gauche Alchemy: lime green and white polka dot tape, turquoise striped tape
MME: LostnFound 2 embellishment and brad
Ranger: Archival ink in black
Other: Paper clip

May Arts: Satin Pleats
Tattered Angels: Inchworm Chalkboard
MME: LostnFound 2 cardstock punch and brad
Ranger: Archival Ink in black, Distress stain in broken china


Tattered Angels: Inchworm chalkboard, turquoise glimmer
MME: Lost n Found2 brads, paper punch
Ranger: Archival ink in black
other: paper clip


VLVS!: Don't follow your dreams, Line of chevrons, feed your soul, six hexagon background
May Arts: Silky Crush
Tattered Angels: Inchworm chalkboard, turquoise glimmer
MME: Lost n Found 2 Cardstock embellishments, button, brad
Gauche Alchemy: Punchinella (star)
Ranger: Archival ink in black, distress ink in broken china and peeled paint
Other: paper clip, floral beads

I'll link up to Paper Issues 

Adios!♥

Sunday, November 4, 2012

December Daily Class Kit!!


Before we move on with all the reveals of the UmWowStudio Kit Club.. I want to introduce you to a class I'll be teaching!!

I'm so excited to jump in and teach a class featuring a few of my favorite things!

First off.. here's a photo of the DECEMBER DAILY MINI ALBUM I'll be teaching :) 

It's made using Viva Las VegaStamps! stamps, May Arts Ribbon, and paper by Authentique, BoBunny and Bazill. (Plus kraft and black plain cardstock)

This December Daily mini album has 31 pages, pockets and tags for you to record all your favorite little things that happen each day during December. I will be teaching this class @ The Crafting Place here in Las Vegas on the 30th 4-8pm, but I'm also offering an online version! Here is the break down:

The Main Kit:
$55
This includes all the bits n pieces needed to build the basic kit, including any flat paper pieces (cut to size), die cuts, flat paper embellishments, ribbons, twines and fibers, paper clips, vintage buttons, binder clips, floral beads and the binding. It does not include basic supplies like inks, paints or tools. If you purchase the main kit, you will also receive (free of charge!) a PDF + Links to a few video tutorials showing you how to build the album page by page. :) 


The Stamp Kit:
$24
This includes the WHOLE December Daily stamp set I designed earlier this year. You will receive 65 individually CUSHIONED, deep etched PINK RUBBER stamps ready to cling to your acrylic block! They're stamp ready so you can use them to get right to work building your album!

The PDF + Video Tutorials$15
This will be a ginormous PDF tutorial with links to a couple private videos showing you how to build the album page by page! This is FREE if you purchase the main kit :)


The UmWowStudio Embellishment Kit:
$18
This kit will be the same normal price as always before, it will coordinate beautifully with this December Daily Mini. This kit will be similar to the previous UmWowStudio embellishment kits you've seen; banners, flowers, hat pins, paper piecings, scatters, silhouettes.. that type of thing!

Shipping:
The Embellishment Kit Ships on its own for $3 like always.
The Main Kit Ships for $6.. add anything to that box and the shipping stays the same :) 

Sign Ups:
I will accept any and all purchases through the 12th. I will need time to then order the appropriate amount of supplies to put the kits together and get them back out to you in time to build your album! The PDF is not yet complete, if you order the main kit, it will be sent to your email the same day your kit ships. If you do NOT order the main kit, expect it in the next 2-3 weeks. 

Any questions? I tried to be thorough but realize I probably missed something, lol. 
If you're ready to purchase or need some answers email me @ umwowstudio@gmail.com 

P.S. -- this class is NOT live (Unless you're here in LV!), it is in tutorial form via a PDF and some videos on techniques, but I really hope to be ready to make the next class a live one where we can interact more!! That being said.. I am ALWAYS here to help you on something you don't understand, or may just need a little extra help with!!!

I will also be posting throughout December sharing how I finish each page with pictures, journaling, doodling and maybe some extra bits n bobs :)

Thanks so much!!! 

Wednesday, May 30, 2012

May Arts DT Call Round 1


Here I am, throwing my name into the hat for the May Arts DT call. I've been lucky enough to be chosen for quite a few of the May Arts monthly challenges and love working with such beautiful high quality ribbons.

Here is my tutorial format project (in written format): 

Gather supplies: a gorgeous super wide dark brown burlap ribbon by May Arts, Basically Bare canvas fleur de lis, Distress Stain in Pumice Stone, a medium color burlap, muslin, dark brown quilting thread (it’s thicker than normal every day thread), vintage buttons and pillow fluff! (don't forget the sewing machine!)
I splattered some distress stain on my teflon mat, gave it a bit of a spritz with water and dipped my fleur de lis in it. I then set it out in the sun to dry… I did try heating it with a heat gun and for whatever reason it kept getting a purple tint. Mr. Natural Heat to the rescue :)
After he was dry I sewed a piece of burlap to a piece of muslin.. I knew I wanted the burlap to be the main texture of the pillow.. but didn’t want the fluff to poke through the open texture, so I created the base of the pillow from a nice tightly woven muslin. After the burlap was sewn to the muslin and my fleur de lis was dry I placed the Basically Bare canvas piece on top of the muslin and stitched a couple of times with the dark brown quilting thread.. not only to hold it in place but to pull together some of the darker browns I wanted to introduce into the pillow.
Then I sewed my May Arts ribbon on at the top and bottom.. Keep in mind there’s no back on my pillow yet.. At this point in time I’m basically building what I want the front to look like! After the ribbon is in place I pulled a couple of burlap strings from a scrap of the ribbon and sewed my vintage buttons into place.
Then I sewed my two sides of the pillow (my front piece and the back piece) together WRONG SIDES touching.. but I left a small section unsewn so I could pull my pillow right side out! This makes a very crisp clean sew line all the way around. Stuff pillow.. sew shut the tiny spot.. and DONE!


Here is a video I did on making Washi tape (not ribbon based, but a video none the less!)


And here are some general projects that utilize ribbon:


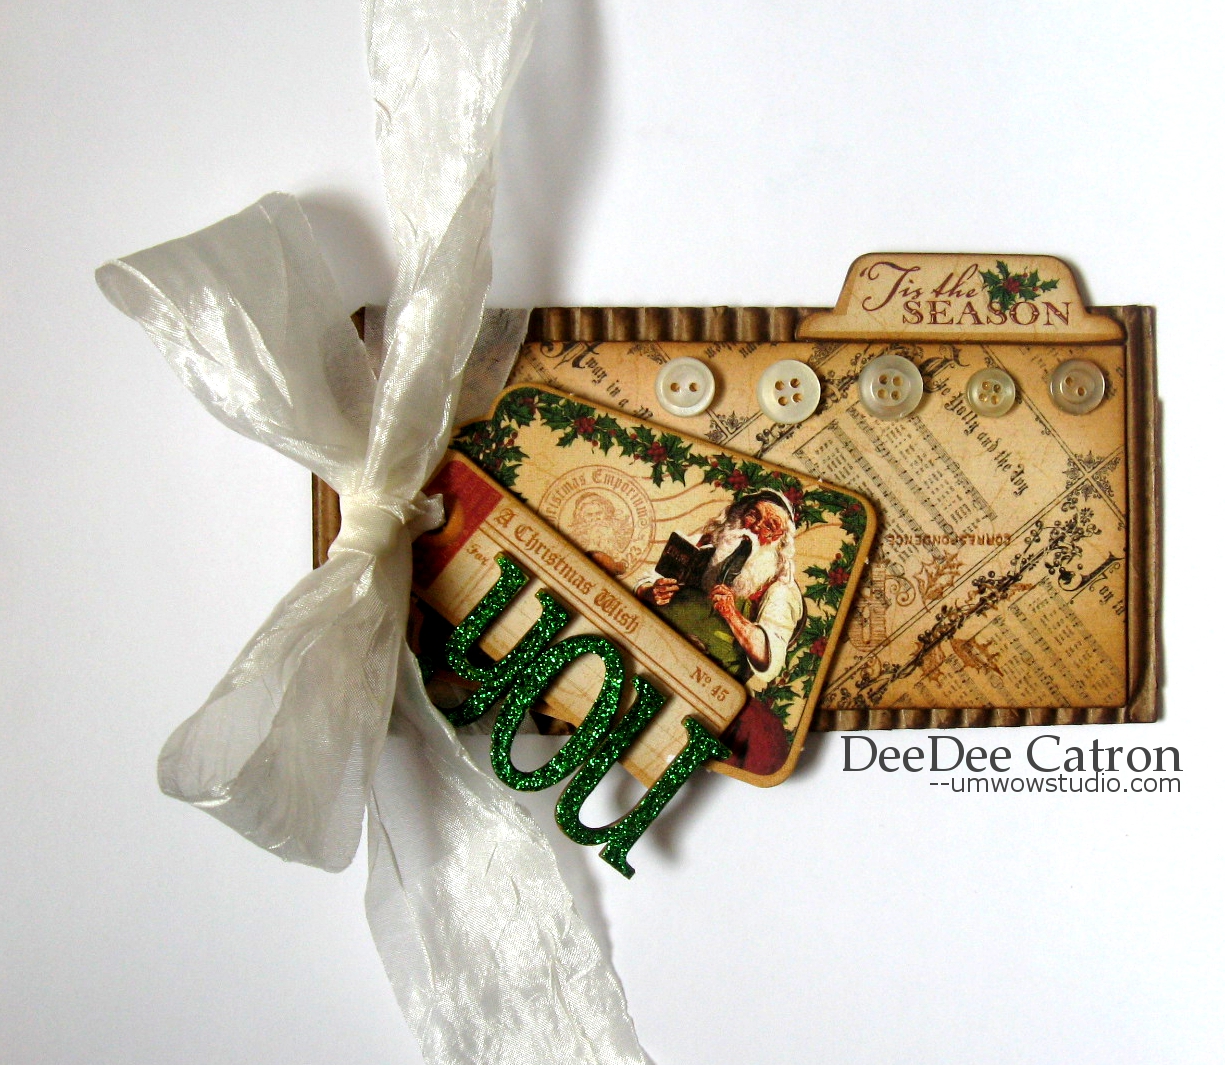
A mini album made of journaling cards. Ribbon is wound through the binding as well as used for tabs to open the book.


A Christmas tag using gorgeous May Arts ribbon to hold together all the beautiful layers.


A Mother's day card using white seam binding hand dyed and burlap string.


A wall hanging using four different May Arts ribbons, three to make a Prima inspired flower and one as stitching on the stocking. 


An altered tray using tinsel/ribbon and a sheer ribbon as a layer in the title banner. 


A Christmas tag/card using four different May Arts ribbons to really make it a "keeper"

Sunday, May 6, 2012

Honeymoon - CC Challenges

This challenge is to make a mini album around a vacation you will or have taken --- We just don't vacations (until this summer!) So I did ours on our "Staycation"


I made the base for the album out of MME's Life Stories journaling cards. Used Imaginisce punch as well. and the Precision pen. all from CC
Not CC : Cosmo cricket black chipboard, baker's twine, lace, kraft paper, dymo label maker, vintage buttons.