Showing posts with label paint. Show all posts

Saturday, February 28, 2015

Libre by Ladybird


Today, I'd like to show you a little tip to add colour and texture
to your chipboards with a single operation!
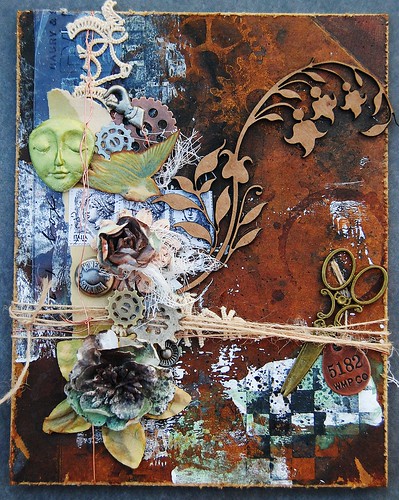
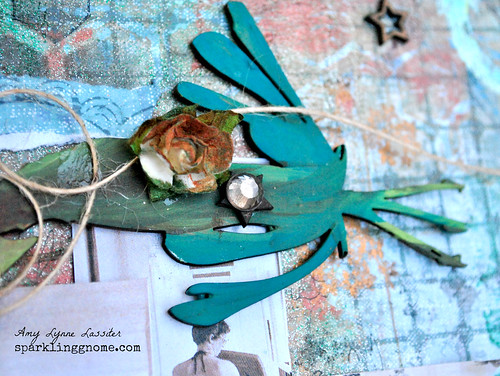
In order to achieve the effect seen above on the leaves,
I used acrylic paint, a stampink block, black ink and a stamp.

Start by putting a few drops of paint on the stamping block.
Then, turn it upside down on the chipboards to add the paint on the chipboard.
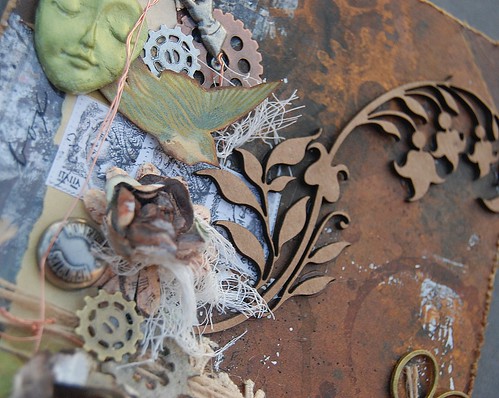
As you can see above, when you lift the stamping block,
this adds some texture to the chipboard that seems to be
the natural design of a leaf in the nature.
Let them dry... then stamp the pattern of your choice over the paint!
I used a book background.

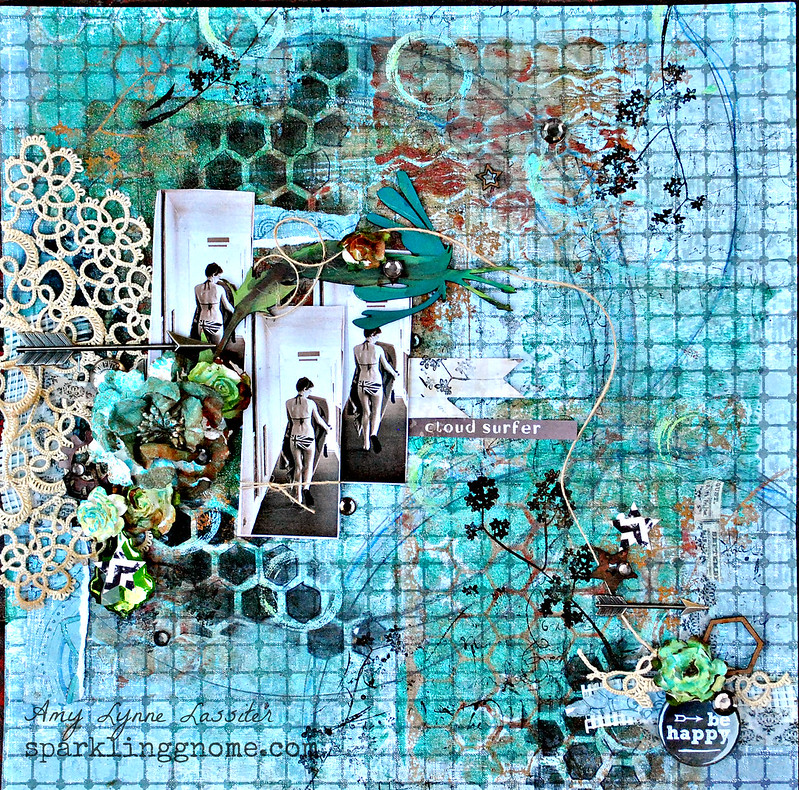
And that's done, you can use them on your layout... here is mine!
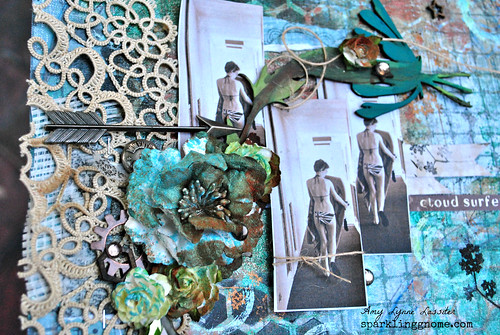
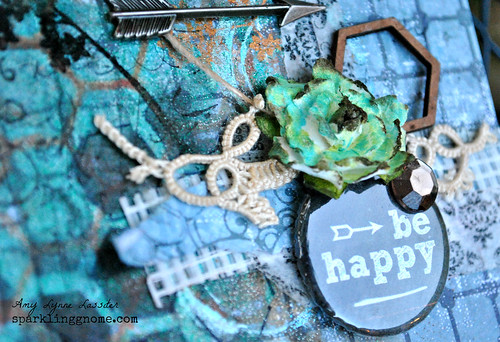
Some details.
 
For this layout I used:
Circle Confetti Chipboards
And also: Lucky7Factory paper, Rose Moka words, Basic Grey letters, Lime Citron stamps

Enjoy your week end!

Sunday, October 5, 2014

A Cozy Fall Tag


Hello and happy Sunday to all you wonderful UmWowStudio fans! It's Amy here to share a sweet tag I made to celebrate the arrival of fall here in the USA....and along with this glorious season comes scarves and jackets, and bundling up to enjoy cider and hay rides. I wanted to take a stamped image of a girl all bundled for fall, and doll it up with fabulous UmWowStudio products.


I started with layering paint onto my tag, and then layering stenciling, using the Harlequin Mask and Circle Confetti Mask. I next layered on plenty of papers, trims and tapes, and stamped and mounted my stamped image, using 3D foam tape.


After adding the Prima flower at the top of the tag, along with some leaves, an UmWowStudio Leaf Stem was just the ticket to an elegant look, and sprinklings of Star Confetti across the top and middle gave a lot of interest.


Finally, I added the Alpha One letters to spell "cozy fall" at the bottom of the tag. These letters are the perfect delicate size for a tag project like this. I'm so happy with the outcome!

Thanks so much for having a look at my tag, and I hope you all have a lovely rest of the weekend!
~Amy

Supply List: 
UmWowStudio: 
Masks :Circle Confetti, Harlequin
Chipboard: Alpha One, Star Confetti, Leaves and Stems
Stamp: Stampotique
Trims: Webster's Pages, Vintage
Washi Tapes: Tim Holtz, Recollections
Ink: IMAGINE Crafts
Paint: 13 Arts, Plaid
Papers: Moxie (from Scraps of Darkness Kit: Transitions)

Monday, July 28, 2014

A Little Bit O' Steampunk

cover full, uws, allassiter
 Hello UmWowStudio fans! It's Amy here today, to share a mini book cover. I was wanting a little book to house photos of our move from Kansas to Iowa, and I saw in my stash, I had a couple of 7 Gypsies book covers. I set straight to work with my paint, stamps, and UmWowStudio chipboard bits.
chip close, UWS allassiter
This was the first project I made right after moving, and I was needing to let go of some creative energy that had been building up....so I was not thinking much about the design, just keeping things in an L shape, and adding freely. Adding the Floral Flourish, my first UmWowStudio love (really, I am pretty sure I've used this piece about 10 times at least) gave a nice moving focus to the small 6x6 cover.
I hope to share future pages in the interior of this book, a little "moving journal."
Thanks so much for having a look today!
Loves,
Amy

Supply List:
UmWowStudio: Chipboard-Floral Flourish
Stamps: Viva Las VegaStamps!
Flowers: Prima
Metal Bits: Bead Landing, Finnabair (Prima)
Paper: 13 Arts, Jenni Bowlin Studio
Twine: May Arts
Ink: IMAGINE Crafts, 13 Arts

Wednesday, June 18, 2014

Cloud Surfer

cloud surfer full, ALLassiter Hi there! It's Amy here today, to share a layout made with some wonderful UmWowStudio products, and pops of some of my favorite colors. I used my new Gelli Plate, paints, and the Hexagon Mask. I also used the mask and some black ink, and created spots of honeycomb randomly throughout the page. I like this eye catching detail. cloudflowersclose
The photos are of my daughter, at the time 13 years old, heading down the hall to the beach, while we were in Hawai'i. She was excited, and thinking carefully about what was ahead...and it was a neat moment I still remember vividly. It's nice to have the photograph to go back in time to a lovely moment.
I used a vintage doily, some grunged up Prima flowers, and the beautiful flower chipboard piece from the Flora and Fauna collection  to complete the top of the layout. chipcloud
Finally, I created the little cluster at the bottom of the page, using several little elements that were used elsewhere on the layout. Topping it off is the cute "Be Happy" flair piece, from the Sidewalk Chalk Flair collection.

be happy flair corner

It's amazing how all the different little shapes from the different chipboard confetti collections, easily come together to add something special to a page. On this page, I used bits from the Hexagon, and Star, confettis, and they make a lovely little sprinkle of happiness.
Thanks so much for having a look today. I enjoy spreading the UmWowStudio love, and hope you too will grab some and make something pretty, very soon! 
~Amy

Supply List:
UmWowStudio
Hexagon Mask
Hexagon and Star Chipboard Confetti
Sidewalk Chalk flair
Flora and Fauna chipboard Flower

Paper: Fab Scraps, from Scraps of Darkness Kits
Ink: IMAGINE Crafts
Metal Embellishments: Tim Holtz
Flowers: Prima, Recollections
Twine: May Arts
Stickers/Die Cuts: 7 Dots Studio-Nature Walk
Paint: Folk Art, 13 Arts

Saturday, March 15, 2014

Week 6

Hi! Lisa back with you today to share with you my Week 6 pocket scrapbooking/project life layout for 2014.


I enjoyed mixing some blue paint with some Golden texture paste and using the Star Confetti Mask spread it on nice and thick to give my cards the extra texture I love.


Layering on two of my favorite chipboard sets added more interest, without too much thickness in the pockets. I really liked how both the Star Confetti and the Arrow Title Mash coordinated so beautifully with the stencil!


I continued to add the chipboard all over my layout to pull it all together.
 
I added a couple of my favorite Sidewalk Chalk flair to finish this design off.
 
 
I love how Um Wow Studio products create lovely pocket scrapbooking/project life spreads and can help you pull your whole design together!
 
If you would like to visit my personal blog to see more about perfectionist pocket scrapbooking with more of this layout, check it out here.
 
 
Have a Happy Weekend!
 
UmWow Supplies:
Star Confetti Chipboard
Arrow Title Mash Chipboard
 
other supplies:
Epiphany Crafts Pennant Tool and Bubble Caps


Friday, October 18, 2013

Painty How-To by Rachel Whetzel

Hey folks! DeeDee here today, bringing you a little how to from the super talented Rachel Whetzel! She gets some seriously great color on the surface of her UmWowStudio chipboard and was totally in for showing us how! She shows step by step how to get this:


She says: I started out with a piece that I painted and didn't end up liking. I actually used some mists on it, and it didn't look the way I wanted. 


So I sanded that down, and started layering the paint on! I use my finger to rub the paint layers into the chipboard, and to get rid of the paint lines. 


Then I used some punchinella to add some color over the red. Once that was dry, I used a larger punchinella(from Gauche Alchemy,) and off set it from the first layer, and added white. 


Then I went back over and put more teal over that!!

 
Cool right??? Thanks so much Rachel! We just pulled in a ton of Distress Paint from Ranger and Tim Holtz which will be PERFECT for this technique! Keep an eye on the store site for the new goods to try out on our chip! :)

Monday, July 30, 2012

Mixed Media LOVE


I can't believe how much I love mixed media and the different styles associated with paints, mists, collages, found objects and anything and everything else that goes into it!!

This weekend I had the utmost pleasure of meeting one miss Anna Debrowska aka Finnabair, who taught a mixed media journal class at Treasured Memories in California. 


here we are together:


It was all I could do to not be a screaming little fan girl.. not talk her head off.. not stalk her and not just pack her up and take her home with me. I must say I was very well behaved! 

Here is the journal we made:


And here is the background for a set of pages for the inside! I've always used vintage photo distress stain for my "tea stained" look.. but anna says go straight for the tea! it's the only thing that actually LOOKS like tea. and I must say.. it was fun splattering a big bowl of tea! 


And she had the most ingenius idea of adding a pocket to the end of your journal for ephemera, bits n bobs, inspiration pieces and mementos from trips as journal page starters! In mine I've got a bit of prima paper from our kit, our beach parking stub and two embossed pennies from the trip. 


It was truly magical watching Anna work.. basking in her creative process was astounding and I'm so thoroughly happy to have been able to do it! I'm excited to gather a few more supplies from the class and get started on some of my own pieces of work!

And of course I couldn't NOT represent VLVS! --- I used the chicken wire background and the birds on a wire stamp :) They're both in Archival black.. without a block though, so that they're grungy sort of "misstamped" on purpose!