Showing posts with label scrapbook layout. Show all posts

Friday, June 3, 2016

Hello by Kareen


Hello!

Here is my first creation for this month.
I did a layout (this is what I like to do, no need to tell you huh? hihi)

I keep the chipboard all natural, it add a little punch to the creation : 

A close up : 

For my layout, I used : 


Thanks for stopping by!
See you next time!


Monday, May 30, 2016

Twinkle layout


Hello friends!
It's JaMajka here today!
Today I have for you delicate mixed media layout, 
I love to make layouts in this style 
with a bit of mixed media ingredients.


I used:


Thanks for looking :)


Wednesday, October 14, 2015

Daydreamer!


Hi and Hello, Jana here with a new Layout for you...
I had this photo in my box of photos i want to use for over 2 years now! Time to get it on a Layout!
In the "Inspired Flair" is one with a DayDreamer on it, perfect for this project...


and the middle one really is a DayDreamer... and this photo shows him, lost in thoughts... feets in the saltwater... enjoying the day!


it was a cloudy day, so the chipboard clouds are also perfect for this layout!
ok, the stars are not - but they matches the dreamy feel of the theme!


some stamps, a touch of gold... some splatters and some thread and i call it done!


i really love this layout and i really love to use chipboard pieces on my projects!
here are the things i used on this layout...

"Inspired Flair"


Thanks for stopping by!
i wish you all a great day
Jana

Monday, March 2, 2015

Inspiration for March UmWowStudio's Sketch

Hello!

It's JaMajka here :)

Today I would like to show you 
my layout created as an inspiration
 for our March challenge, where I used


I used:


And now some details and close-ups:


Have a great day!


Wednesday, November 5, 2014

Son Flowers by Jen Matott

While at a crop recently, I was challenged to use up some of my older paper in my stash... so, not one to back down from a creative challenge, I agreed!    I used some of my older Prima and Studio Calico papers to create the background.  I also used some of my older Sassafras Lass stickers!   BUT I also mixed in some of UmWow Studio's Chipboard and Flair!

 Look at that gorgeous chipboard!  They are Flourishes Two and have a very vintage feel to them. I love how they pair with the paper flowers and fabric leaves for extra texture!
 My son, Mark, used to pick me flowers all the time.  He especially loved the dandelions because they reminded him of the sun... he called them "sunflower". I call them "son" flowers!  LOL! 
I used some of my Faber-Castell Design Memory Craft Whipped Spackle through an arrow stencil.
 Here you can see the paper flowers I made using my Cricut Art Booking cartridge along with some more Flourishes Two chipboard and a Flair from The Bee's Knees Set.  Those yellow flowers are perfect for this page!
Even though summer months are behind us here in Central New York, I have my memories!  Those will keep me warm in the cold months (or at least that is what I'm telling myself :)!


Materials:
UmWow Studio Flourishes Two Chipboard
UmWow Studio The Bee's Knees Flair
Papers: Prima Marketing Sunrise Sunset paper pack and Studio Calico
Cricut Art Booking Cartridge
Stencil: Crafter's Workshop
Prima Marketing leaves
Sassafras Lass border sticker
Faber-Castell Design Memory Craft Whipped Spackle
Faber-Castell Design Memory Craft Essential PITT Artist Pens
Faber-Castell Design Memory Craft Stamper's Big Brush Pen in black
American Craft twine
Kraft doily
India Ink

Wednesday, August 20, 2014

Temple Bayon by Miae

Hello all!

Have you ever been to Cambodia and wandered among the many temple ruins? We had an opportunity to do so last year and one of the amazing, standout temples we explored was Bayon. Here I'm sharing with you a photo of one of the many stone faces that grace Bayon's towers.


I wanted to create a page with an ancient feel. I loved the way the Brick Mask helped me do just that with the background. I used paper from 7Dots Studio Love is in the Air collecton, took an Oil Bar to the Brick Mask and created the background.


Next, I took the square chipboard from Layered Squares and cut them down to create rectangles (more along the lines of the bricks). To given them a more rough, stone look, I dabbed them with molding paste, then painted them with metallic watercolors.


There are jungles all around the many temples in Cambodia so I wanted to add a floral element to my layout. I took chipboard from the Floral Collectioin and painted them with Distress Crackle paint.


I hope you find some inspiration here!

Supplies:


7Dots Studio Love is in the Air
Prima Blossom Branches Walnut
Stampers Anonymous Floral Tattoo
Inkadinkado Floral Damask
Distress Crackle Paint


Monday, June 23, 2014

This Happened with Manda

Hi everyone, Manda here and today is my last day to post for Um Wow as part of the Design Team. I have loved being part of a team with so many talented ladies and working with some wonderful products, I will definitely be sad to go but cannot wait to see what the new team makes to inspire us with.

For my last project I decided to get messy with some mixed media. Starting with a plain piece of aqua cardstock I first added a thin layer of gesso and then used two 12x12 stencils (both heidi swap) a sunburst which I misted with Citron Color Shine and a hexagon with I used a blue Mister Huey mist.
After that I took a small Heidi Swapp stencil and used Tim Holtz distress ink to make bold triangles. I also added some random stamping with a Glitz roller stamp. To finish the background off I took my gelatos and added colour around the edge. 
Once my background was done I used the Hexagon Background chip and layered my papers and photos on top. When I placed the chipboard I didn't think about the balance of the page so I then had a gap on the right hand side. To fill in that space I took one of the Avery Elle stamps we recently worked with and stamped in Tim Holtz Vintage Photo Distress Ink. I used the Arrow Title Mash chip for my title, this is one of my favourite sets I use all the time. To finish off I used a flair from the Oh Places You'll Go set.

So that is it from me today, thank you so much for stopping by and a HUGE thank you to Dee Dee for having me as part of this amazing team.

Manda xxx

Um Wow Studio Materials
Hexagon Background Chip
Arrow Title Mash Chip
Oh Places You'll Go Flair.

Other Materials
- Stamps: Avery Elle Stamps To The Point, Glitz Roller Stamp
- Paper: Studio Calico, Amy Tangerine
- Embellishments: Amy Tangerine, Basic Grey
- Other: washi tape, gesso, Heidi Swapp Colour Shine, Studio Calico Mister Huey's, Heidi Swapp stencils, Tim Holtz Distress Ink, Faber Castell Gelatos.

Monday, May 19, 2014

Noted by Manda

Hi everyone Manda here today sharing a quick layout about my favourite shoes! Seriously these are the most comfortable, cutest shoes I have ever owned so they needed a layout about them.
I kept the layout itself very simple because of the mosaic tiles in the picture, using a lot of patterned papers and layers would have made the page very busy and I loved the pattern of the tiles so made that the focal point. I started out by using watercolours to put a light wash over the white cardstock and then just added some washi tape as a background.
I decided gold was going to be the main colour of this page because of the photo overlay I used so I simply took some Heidi Swapp Gold Lame Color Shine and a paint brush and painted it directly onto the chipboard pieces I used. It leaves a lovely gold shimmer that looks like metal.

Thank you so much for stopping by,
Manda xxx

Um Wow Studio Supplies:
Start Confetti
Arrow Title Mash
Layered Arrows


Thursday, April 17, 2014

Sweet Boy {Scrapbook Layout}

Sweet Boy, Full, UWS, ALLassiter Hello UmWowStudio fans, it's 
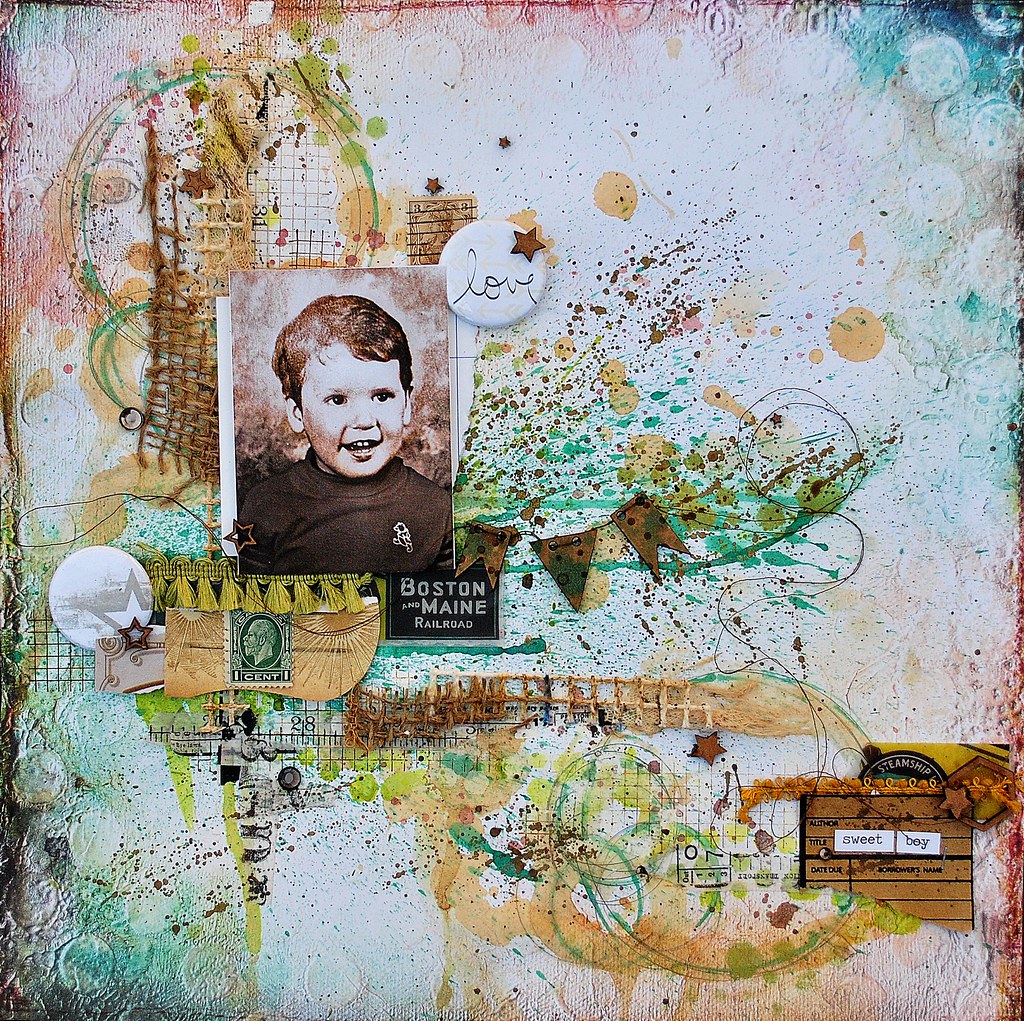
Amy here today, to share a layout I created using a favorite photo of my sweet husband when he was around three. This is the first photo I've scrapped using a little boy, as I have three daughters; so I started by choosing a fairly unisex color palette. Once I had created the background, using Lindy's Stamp Gang mists, tea stain, and paint,(I used the Hexagon Confetti and Checker Board masks in random areas throughout the page, using a green metallic paint); I layered on washi tape, stamping, and finally fibers (cheesecloth, latch hook rug fabric, burlap)...and of course the paper and photo layers.
love flair, sb, allassiter
When it came time to embellish, I used flair from  Life is Good  and Moon Shine.  and scattered gently across the page are pieces of Star Confetti, and a bit or two from the Layered Hexagons.
mini chip banner, sb, allassiter
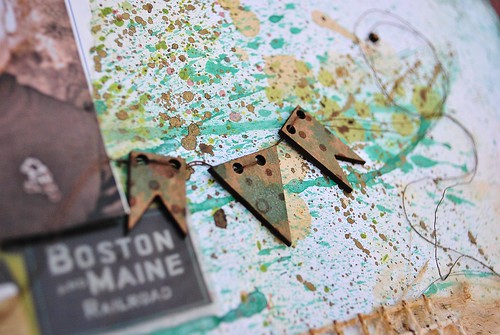
Finally, I misted three pieces from the new and wonderful Banner Mash, and strung them with thread...easy peasy! I'm so excited with how this layout turned out, and I have it on display....the perfect way to share a sweet picture of a now very sweet man. :)

 Supply List:
UmWowStudio:
Chipboard-Banner Mash, Star Confetti, Layered Hexagons
Flair-Moon Shine, Life is Good
Masks-Hexagon Confetti, Checkerboard
Paper: 7 Dots Studio, 9th Wave
Transparency:Glitz Design
Journal Cards: Jenni Bowlin Studio
Stamps: Viva Las Vegastamps! (washi tape)
Mist: Lindy's Stamp Gang
Tissue Tape: Tim Holtz
Paint: Plaid, Viva Decor, LuminArte
Trim: The Paper Studio
Ink:Tsukineko
Other: Burlap, Latch Hook Rug fabric, cheesecloth, thread (coates twig), vintage stamps, tea for stain