Showing posts with label ribbon. Show all posts

Friday, October 14, 2016

A gentle heart


Hello everyone, 

and welcome to today's Creative Team post. 


I have been playing with some more muted colours in the last few days. Maybe because I am sad that summer is over? Who knows. What I do know is that I thoroughly enjoyed my experimenting. 
This art journal spread is an example of this experiment. 


The base of this journal spread is a piece of Pattern paper from the Nature Walk series designed by DeeDee Catron. She is so very talented ! 

Here's how I did it:


I cut the 12 x 12 to size (I actually changed this later as I cut off the white from the left page. Later I decided I wanted the pattern of the splatters to continue... 


Next I used some modelling paste through a piece of punchinelle (sequin waste) and dried it gently with my heat gun.. 


Next I thought it would be fun to use some gilding flakes. I usually avoid using them at all cost as they go everywhere... lol 
I think the result was worth it though. I also inked the edges of the pages.


How fab is that ?


Another look...


Next I used some black embossing glitter to colour and coat the heart. It is not really a glitter, more a glint... 


After did all that, I started stamping the background, of course I forgot to take more photos... All stamps I used are by VivaLasVegaStamps! (What else?) and I used different colours of Archival ink. The sentiment was stamped on the page directly but I messed up so I stamped it again on a piece of the same paper but turned around; I inked the edges and added some brads and then added it on top of the one I messed up. The flowers in the heart were a piece of ribbon that I was given. It was pink and I coloured it with inks to match the rest of the page. 
I glued the pages in my journal and that was that ! I really like how it came out.  

I used only one chipboard today:

Scribble Heart and you'll find it HERE


Thank you so much for stopping by today ! 

Corrie x


Monday, August 4, 2014

Happy Birthday Tag with Jen

Hi artsy friends!  Today is a fantastic day here in my neck of the woods and it is my 40th birthday!!  So, for my project, I made a birthday tag to share with you all...  I have many friends that have birthdays in August too.  Every birthday is a time to celebrate! 

"Make a Wish Tag"
 I got my hands on some of the brand new UmWowStudio Sequin Confetti and knew I had to do something fun with them! I love the color of UmWowStudio's chipboard so I didn't want to color them but I did mix them with bright colored plastic sequins too.  I also turned one of the Layered  Clouds into a cupcake top!  The Make a Wish Pocket Chip was perfect for this tag with it's adorable size and punched out words and chevron. 
 I did color the background tag with Faber-Castell Design Memory Craft Gelatos® in Mango, Bubble Gum, Tangerine, Lemon, Raspberry, Blueberry, Lime, Snow Cone, Gold Champagne, and Iced Chai
Using Faber-Castell Design Memory Crafts Textural Accents Whipped Spackle, I put it through a Circle Confetti Stencil to create depth and texture.   Those drips and splatters made it even more of a celebration!  I did paint the Make a Wish Pocket Chip with watered down Gesso before splattering with cool colored Gelatos.
 The cupcake wrapper was stamped on patterned paper and the Layered Cloud was covered with WOW Embossing powder in Vodka Sparkle. 
 A flair button was added too for another circle accent along with the confetti and doily.
I finished the tag off with ribbon and some Chevron Confetti.  This is a festive way to adorn a gift, bottle of wine or attached to some flowers! 

UmWowStudio Products:
 Sequin Confetti
 Layered  Clouds 
 Make a Wish Pocket Chip
 Chevron Confetti
 Circle Confetti Stencil

Other materials:  Faber-Castell Design Memory Crafts Textural Accents Whipped Spackle & Gesso, Faber-Castell Design Memory Craft Gelatos® in Mango, Bubble Gum, Tangerine, Lemon, Raspberry, Blueberry, Lime, Snow Cone, Gold Champagne, and Iced Chai, WOW Embossing Powder in Vodka Sparkle, Tim Holtz tag, doily, Studio Calico confetti, aMuse patterned paper, Close to My Heart birthday stamps.

Friday, May 16, 2014

May Arts | Avery Elle | UmWowStudio

Hello friends!! Welcome to day 5 of our super special 3 way hop between us here @ UmWowStudio and the fabulous teams of May Arts Ribbon and Avery Elle.


All week long we'll be sharing projects from our teams using amazing products by all 3 companies. And it never hurts to encourage a little fan participate by having a GIVEAWAY! So be sure to stop by each day this week, all three blogs, comment on the posts, and be entered to win! We have three fabulous prizes, one from each blog. Three random winners will receive 1 spool of ribbon, 1 stamp set, and 1 prize pack from UmWowStudio that includes chipboard, a mask, and flair!
(this prize is open all weekend long. Winners announced next week!)


Our final two projects for this amazing hop are one by Anai:


I wanted to create something very sweet and romantic for our swap :)
I made a birthday card mixing all the goodies in a very girly way.
I started with floral stamps from the Avery Elle "Petals and Stems" set. It's a great set, which allows you to stamp all the elements separatly and then make your own floral composition in layers. You can see more photos of details on my blog (http://anai.pl/blog/?p=3567). On the bigger flower I used clear glitter from Ranger - the effect is just stunning :)
And I have to say - I fell in love with this amazing lace with a pearl beads in the center! It's so elegant, so delicate, so great for the romantic cards!
Then I just added few UmWowStudio goodies - tag from the "Nature Walk" collection, delicate flair, amazing BlueBell chipboard and some circles made with our mask and texture paste :)
As you can see - our swap is really great - so many different styles, so many different ideas!


Products:


and one by Wiosanka 


It a canvas with photo of my younger boy. I made it for him on a special occasion - 6th Birthday :-)
He is always happy and smiling and so is my project ;-) A little messy, joyful, with a few important words.
I would like my son to be always adventurous, smiling and aiming high. And I hope he will :-)

UmWowStudio supplies:
Nature Walk ENTIRE KIT
Brick Mask
Family Hashtag Banners
Layered Arrows
May Arts Ribbons

Avery Elle Stamps

Thanks so much for stopping by each day this week! We'll leave the giveaways open through the weekend and pick a winner next week. 

Thursday, August 29, 2013

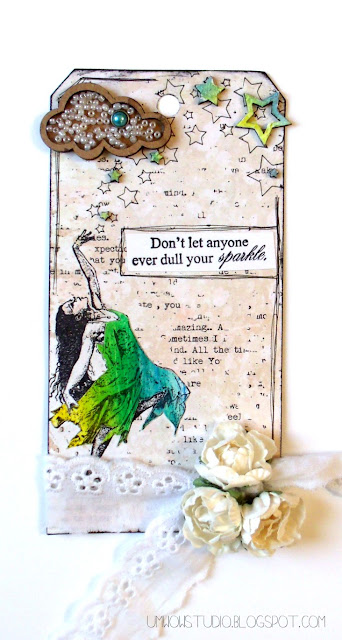
Don't Let Anyone Ever Dull your SPARKLE!

I wanted to share this tag on the UmWowStudio blog as well as over @ Viva Las VegaStamps! (there's a video there on creating the colored dress for the Dancing Lady!)


this beauty has a little extra meaning and will be making its appearance at someone's door step any time soon!! ♥♥ 

Tuesday, August 20, 2013

Home Sweet Home {May Arts Ribbon Cutting Ceremony}

Hello Friends!! 
Welcome to my stop today on the Ribbon Cutting Ceremony Hop!


Bethney has gathered all the beautiful talented Ribbonistas together to celebrate a brand new site launch! May Arts has been working so uber hard on a brand new more interactive site and you won't believe how insanely awesome the redo is!! PLUS there's a GIANT giveaway of $1000 + -- all from your favorite companies!


Yesterday these girls all shared projects:
Christina Colón
Gini Williams Cagle
Emily Lanham
Jenifer Cowles
Jessica Kephart
Courtney Lee
Latrice Murphy
Charlene Driggs
Erin Thiem

And today it's THIS half's turn:
Candy Rosenberg
Jen Shears
Karen Baker
Lalo IK
Virginia Fynes
Rhea Weigand
Shellye McDaniel
Sandy Allnock
{{DeeDee Catron}}

And now.. I Get to share!! Today I'm sharing with you a 12x12 layout. When Bethney mentioned Ribbon Cutting Ceremony I immediately thought of big red bows being cut right in half, trimmed edges and straight up strips of ribbon. So I set out to commemorate our first home as a family with these things in mind. Needless to say the work took me in a slightly different direction, but never the less RED and RIBBON are still recognizable! 


I layered up some gorgeous ribbons ( 447-1-01 | 336-38-14 | SM08 ) to embellish this layout.


I clipped and layered my ribbons, along with 7 Dots Studio (Domestic Goddess paper and alphas,) Viva Las VegaStamps! stamps (Star, Grid Background, Striped Border Arrow, Coffee Ring,) Gauche Alchemy (Washi Tape,) UmWowStudio (Layered confetti chip, Black and Blue Flair, Chevron Lines Mask,) Pink Paislee (Luxe Alphas,) Prima (flower and leaf,) Tattered Angels (Charcoal Chalkboard,) My Mind's Eye (Epoxy brads,) Archival Ink by ranger in black, Stazon ink in red, a black pen.

Leave your glorious comments everywhere for this INSANE prize!!

Monday, July 29, 2013

Beach Sighting -- {Viva Las VegaStamps! & Genuinely Jane Studio}

Hello everyone! Today we're hopping with Viva Las VegaStamps! and Genuinely Jane Studio!! 


We're combining some superb wooden albums with our gorgeous, deeply etched, high detailed, pink rubber stamps!


You should be here from LORI. If not start over @ the VLVS! blog :).


Today you saw THIS Sneak peek:


The whole piece is a Barn Door Album that I've tied together in a display piece:

I started by scene stamping some different images to create an under water scene. The stamps I used from left to right for the scene stamping on the bottom: Sea Scene - Leaf - Mountains and Cactus (this was PERFECT for the bottom of the ocean!) - Century Plant - Long Shell - Sunken Anchor - Leaf (again) - Helix Shell - Century Plant (again).


I also used the Scuba Diver, the TadPole, and the Jellyfish in the background. I stamped all stamps in black archival ink by Ranger, then colored my wood with glimmer mists. I laid down some tissue tape and my photo, then collaged shells all around the base. The shells were covered with glimmer glaze. I then decked out the collage in glitter, seed beads and e beads.


Other supplies used : UmWowStudio small shipwheel, May Arts Ribbons Twisted Burlap, a starfish, cheesecloth, adhesive. 


I grabbed my Anchor stamp and my Line of Chevrons stamp as a final step to completing this baby!

The Hop:

Tuesday, July 23, 2013

Best of the Ribbonistas Week

This week @ May Arts we're celebrating the Ribbonistas in preparation for the new DT reveal!


Join each day in wishing each talented artist a loving farewell, or in some cases safe passage from one term to the next! (and be entered to win some RIBBON of course!)

Today I'm showcasing these projects:

Follow Your Dreams Layout
Follow your Dreams is a 12×12 mixed media layout using burlap twine to suspend dreams ripe for the plucking!
Joy Christmas Tree
The JOY tree was done for the Ribbonista inspired Tree hop around Christmas time, and it's a TOTAL favorite. It doesn't even leave my mantle!
The Little Things Mini Album
The Little Things of 2013 is me making myself take the time to write down some of my favorite things that happen on regular days. A hair cut, walking on daddy's feet, or trying to whistle for someone's attention.
I'm sharing the spotlight with my super bff Chrissy today, so be sure to check out her projects, too!

Sunday, July 21, 2013

The Stuff Dreams Are Made Of {Gauche Alchemy | UmWowStudio Swap}

Hello Friends!!! Welcome to the first day of our UmWowStudio and Gauche Alchemy swap!


Gauche Alchemy is a mixed media kit company that specialized in the most amazing themed kits of vintage ephemera and mixed media supplies. They also offer mixed media supplies sold separately, like washi tape, specialty papers, punchinella and more! Gauche Alchemy : Site | Store | Facebook

We've paired up this week to use their awesome kits in conjunction with our awesome chip and flair! Up first on our side this week is... MYSELF! :D I've got a 12x12 to share today:


Supplies:

UmWowStudio:


Gauche Alchemy:


Other:
Viva Las VegaStamps! Striped Border Arrow stamp and Row Of Stars stamp, May Arts Ribbons Box Pleat, Echo Park Paper chalkboard cardstock, Pink Paislee Alphas, Recollections alphas, Ranger Archival ink black, Tattered Angels glimmer mist, Studio Calico Mr. Huey, Dymo label maker, black and white gesso, adhesive, gel medium, glitter. 


The whole entire premise of this layout is based off this super kick ass tag/envelope that came in the Gauche Alchemy White Mixed Media Kit! The sequins and the sequin butterfly are its brothers in arms! I put some inside and then sewed it shut, making sure there were enough sequins to be seen in the window. Then the layout came to life in my head and I set to work on the background!


I used GA's punchinella as a mask with some white gesso, to get some big gorgeous circles. They ground the two main parts of my layout. On top of the gesso I layered some washi tape, ribbon, gel medium, cheesecloth, seed beads and sequins. The chipboard was altered with gesso, then layered with gel medium and doused in glitter. 


I tore the corner of the tag/envelope and let the "stuff dreams are made of" trickle down the page and surround my two sweets. I finished it off with a little dripping, a little doodling, and a little stamping. 
>>>While you're visiting us this week -- be sure to leave comments! 


We've got one $20 gift certificate for Gauche Alchemy to give away (and they've got one of ours!) -- and if you can't wait to see if you're the winner of either giveaway : use coupon code UmWowGA2013 for 10% off in EITHER shop!<<<

Friday, July 19, 2013

Down By The Sea -- {Splash Of Color and May Arts}

Hello Everyone!! Welcome to the UmWowStudio blog today :) 

I'm super excited by the venture between May Arts and Splash of Color!
Every month they'll be swapping beautiful paints with beautiful ribbons and creating stunning inspiration!
This month we were asked to pair up May Arts new Eyelet Lace with Splash of Color Twinkling H20's.

I decided to sew myself a little fishy and highlight his fin with the beautiful Twinkling H20's. 


The instructions for building this little guy are pretty straight forward:

-Gather Supplies : May Arts ribbons (447-58-01, BY-01, TG-5-10, and WQ10), Splash of Color Twinkling H20 (Heather Gray), muslin(fish shaped x2), Helmar Fabric Glue, scissors, sewing machine, stuffing, vintage button. 
-Layer top side of muslin with ribbons. Tack down with fabric glue.
-Trim access ribbon.
-Create fins with other ribbons, prepare them by tacking them to the fish facing IN. 
-Lay down your bottom layer of muslin on TOP of the outer layer. Machine stitch closed, leave open a small area.
-Turn right side out, stuff, stitch closed!
-Wet your twinkling H20 and gather a small bit on a non stick surface. Watch the following video to learn how to "dry brush" your eyelet lace. It will create a vintage worn look over the raised parts of the beautiful embossed ribbon. 

-
Here's an up close of the tail:

--don't forget there's a giveaway going on! Comment on each blog :)--

Thursday, July 18, 2013

Find Your Voice Catchup

Hi Folks!! Catching up on some find your voice goodness! I've really enjoyed this workshop so far and am loving the things I'm realizing / learning about myself!!

I'm doing a little catch up but it's not too shabby!


First I really wanna share how the cover of my journal turned out. I ended up cutting a few personal pieces on my cutter and binding together a ton of water color paper. The Journey alphas are from Pink Paislee. The ribbon is from May Arts. That cute little face is from Mary Vogel Lozinak. The Heart Hands are BRAND NEW to the UmWowStudio site! Check them out! I also used UmWowStudio Heart Confetti and one of my newly designed stamps from Viva Las VegaStamps! the Striped Border Arrow.

This was my completion of lesson one.. doing a "you are here" page. The Glimmer Mist is Charcoal and Firefly. I used a piece from the UmWowStudio Love This Flair and You Are Here and GeoTag stamps from VLVS!.


I really loved these photos that everyone was putting together for Week 2  - so I put one together and made it into a page. I still have a few small details to fill in on the right. My mind map is a work in progress and I'll be sharing that later.... 

I really wanted to share though that this week UmWowStudio is the sponsor over @ Find Your Voice, and I'm also a contributor. You'll find the following photos with details here.

 But basically I've come to realize my love for infographic style information (like on the right) and will be implementing tons more of it into my work, as well as recording smaller more detailed happenings in our lives, rather than focusing on the large monumental stuff. Chances are we'll remember those anyways!